CATEGORIES:
BiologyChemistryConstructionCultureEcologyEconomyElectronicsFinanceGeographyHistoryInformaticsLawMathematicsMechanicsMedicineOtherPedagogyPhilosophyPhysicsPolicyPsychologySociologySportTourism
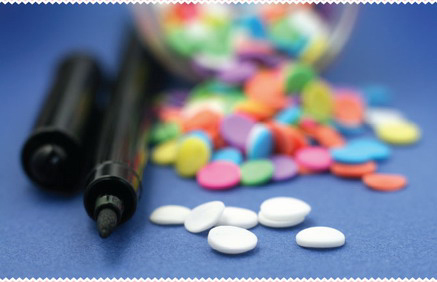
Candy Coating Colors
In addition to candy coating flavors such as chocolate and peanut butter, vanilla candy coating is available in a rainbow of colors. Here is a side-by-side chart of coatings from three popular candy coating makers. All three offer many of the same colors; however, the shades may be slightly different.
Milk chocolate flavored: Make ’n Mold, Merckens, Wilton
Dark chocolate flavored: Make ’n Mold, Merckens, Wilton
Peanut butter flavored: Make ’n Mold, Merckens, Wilton
Butterscotch flavored: Merckens
White–vanilla flavored: Make ’n Mold, Merckens, Wilton
Superwhite–vanilla flavored: Merckens
Light pink–vanilla flavored: Make ’n Mold, Merckens
Dark pink–vanilla flavored: Merckens
Orange–vanilla flavored: Make ’n Mold, Merckens, Wilton
Yellow–vanilla flavored: Make ’n Mold, Merckens, Wilton
Blue–vanilla flavored: Make ’n Mold, Merckens, Wilton
Navy–vanilla flavored: Make ’n Mold
Light green–vanilla flavored: Make ’n Mold, Merckens
Dark green–vanilla flavored: Make ’n Mold, Merckens, Wilton
Red–vanilla flavored: Make ’n Mold, Merckens, Wilton
Orchid/lavender–vanilla flavored: Make ’n Mold, Merckens, Wilton
Peach–vanilla flavored: Merckens
Midnight black–vanilla flavored (Available for Halloween): Wilton
Some candy coating colors are also available in mint flavor, including chocolate, white, green, and pink.
Keep in mind that dark-colored cakes may show through white or light-colored coatings. If you want the coating to be completely opaque, try dipping a second time.
Combine candy coating colors to create different colors or lighten any color by adding white candy melts.
Adding Flavorings
Besides adding color to your candy coating, you can also flavor it with candy oils. These intense flavorings are stronger than the regular flavorings and extracts you’ll find in the baking section of the grocery store. You need to use only a small amount. Some flavor examples are blueberry, bubble gum, watermelon, and peppermint.
Dipping Methods

I mention these methods throughout the book, but they are so important that I want to provide them for you here in one place.
The question I have been asked the most is, “How do you get your coating so smooth?” Well, it’s really simple.
Use small bowls so the melted candy coating is about 3 inches deep. Make sure the coating is thin enough to dip and remove the pops easily. You can use paramount crystals, shortening, or even vegetable oil to thin coatings. And then just tap excess coating off gently using one of the following methods.
Cake balls: If you’re making cake balls, drop a ball into a small, deep bowl of melted candy coating. Cover the entire ball with coating, using a spoon, without stirring or moving the cake ball around in the coating. Then lift it out of the coating with your spoon. With the ball still on the spoon, tap the handle of the spoon on the side of the bowl several times, until the excess coating starts to fall off and back into the bowl. Then let the cake ball slide off the spoon onto a wax paper–covered baking sheet to dry.
See complete instructions in Basic Cake Balls.
Cake pops: The same tapping technique works for cake pops, but it’s done in a different way. Make sure your coating is deep enough to completely submerge the firmed cake pop. Small, narrow, and deep microwave-safe plastic bowls are best, so you can hold the bowl easily without burning any fingers. Glass bowls can get too hot. Dip about ½ inch of a lollipop stick into the melted coating and insert it into a cake ball, pushing it no more than halfway through.
Then dip the cake pop in the melted coating, completely covering the cake ball, and remove it in one motion. If the coating is too thick, gently tap off any excess. Hold the pop over the bowl in one hand and tap your wrist gently with your other hand. If you use the hand holding the cake pop to shake off excess coating, the force of the movement will be too strong and could cause the cake ball to loosen or fly off the lollipop stick. Tapping the wrist holding the cake pop absorbs some of the impact. The excess coating will fall off, but you will need to rotate the lollipop stick so the coating doesn’t build up on one side, making it too heavy on that side. If too much coating starts to build up at the base of the stick, simply use your finger to wipe it off, spinning the lollipop stick at the same time. This can happen if the coating is too thin or too hot. It’s not as hard as it sounds; it just takes a little practice.
See complete instructions for cake pops in Basic Cake Pops.
Cupcake pops: This is a two-part dipping method, but it’s actually the one I find the most fun to do. After you’ve formed the cupcake shapes with the cookie cutter and chilled them until firm, dip the bottom of a cupcake-shaped cake ball into the melted candy coating by holding the mounded top with your fingers. Dip to the point where the mounded cupcake top starts. Then turn your hand over to allow the coating to slide down. This will help make sure the entire cupcake bottom is covered in candy coating. While holding the cake ball upside down, swirl your hand in a circular motion. This is equivalent to the tapping for the cake pops. The swirling motion forces the coating to slide down the side of the cupcake while creating a smooth surface at the same time. When the coating reaches the mounded top, transfer the cupcake pop to a wax paper–covered baking sheet, mounded-side down. Immediately insert a lollipop stick about ½ inch deep into the melted candy coating, and then insert the stick into the bottom of the cupcake no more than halfway through. Repeat with the remaining cupcake pops before you dip the tops.
When dipping the tops, let the second color of candy coating sit or cool for a few minutes before you start dipping. Coating that is too hot can run down the side. If it is slightly cool, it will stay in place.
To dip the top of a cupcake pop, hold the pop by the lollipop stick and dunk it into the melted candy coating until the top is completely covered and the coating meets the edge of the bottom candy coating. You can use a toothpick to direct the coating and touch up any exposed areas of cake.
See complete instructions in Basic Cupcake Pops.
Cupcake bites: This is another two-part method. However, you dip only once. Place one type of melted candy coating in a squeeze bottle and use it to fill a cavity in a plastic candy cup mold about halfway. Place a firm cake ball (smaller in width than the mold shape) into the mold cavity. Slowly push the cake ball down until the pressure causes the candy coating to force its way up the mold and fill in around the sides of the cake ball. You may have to experiment with a couple to get the right amount of coating. Stop pushing once the coating reaches the top edge of the candy mold, so that it doesn’t form a lip around the edge. Repeat for the remaining cavities. Place the mold in the freezer for several minutes to allow the coating to set. Remove the mold and pull out the cupcake bites by holding their exposed tops. Give the mold a little twist, too, to help release the cupcake bites.
Then simply dip the exposed mounded cupcake tops into a second melted candy coating by holding the cupcake bottoms. Try to be quick, because if you hold the bottom for too long, the ridges formed by the mold will pick up fingerprints. You can use candy gloves (see Equipment) to help avoid this.
See complete instructions in Basic Cupcake Bites.
Dipping Do’s & Don’ts
· Do use a bowl deep enough to dip your cake pops and remove them in one motion.
· Don’t get any water in your candy coating.
· Do keep a dry dish towel or paper towels nearby to wipe off your hands.
· Don’t overheat your candy coating.
· Do use shortening or paramount crystals to thin coating that is too thick.
· Don’t use regular food coloring to tint candy coating.
· Do use special candy coloring to tint it.
· Don’t push lollipop sticks more than halfway through the cake ball.
· Do dip the sticks in melted coating before you insert them into cake pops.
· Don’t dip frozen cake balls. Firm, yes. Frozen, no.
· Do have a lot of fun.
Date: 2016-01-14; view: 874
| <== previous page | | | next page ==> |
| Crumbling Your Cake | | | My Two Favorite Tools |