CATEGORIES:
BiologyChemistryConstructionCultureEcologyEconomyElectronicsFinanceGeographyHistoryInformaticsLawMathematicsMechanicsMedicineOtherPedagogyPhilosophyPhysicsPolicyPsychologySociologySportTourism
My Two Favorite ToolsEdible-Ink Pens Dot your eyes. Edible-ink pens are an excellent tool to have on hand if you decide to add personality to your cake pops. They are quick and easy. Use them to draw eyes, mouths, eyelashes, and more. Americolor Gourmet Writer pens come in colors like black, brown, pink, red, blue, and more. You can buy a whole set or just black to suit your need. Use them carefully. If you press down too hard when drawing on the candy coating, residue from the candy will build up on the tip, making the pens difficult to use. So use a very light touch. When dotting eyes on sprinkles, though, you’ll need to press a little harder. Imagine the pen as a paintbrush and the pops as your canvas. Toothpicks Always keep a small container of toothpicks within reach. You can use them to direct candy coating that may not have made its way completely around a cake pop. You can use it to texturize the surface of the candy coating. Or, if your candy coating pools at the bottom of the cake balls after they are placed on a wax paper–covered baking sheet to dry, simply take a toothpick and draw a line through the coating, close to the cake ball. When it dries, you can break off the unwanted coating for a cleaner look. Toothpicks can also be used to apply candy coating as “glue.” They are also extremely useful when adding decorations. After your cake pops are coated and dry, you can use any remaining candy coating left in your dipping bowl as glue. Apply it to candy or sprinkles with a toothpick and attach them to the cake pop. You can also apply the candy coating to a coated, dry cake ball and then place the add-on into position. Use a tiny amount of coating to attach the smallest items, such as sprinkles for eyes. Use a slightly larger amount for bigger add-ons, such as M&M’s or candy necklace pieces. When the coating dries, the add-on will be attached, or “glued” on. If the coating in the bowl has dried, simply heat it again to melt it.
Main Ingredients Here’s a handy list of edible ingredients used in making cake pops. Cake: Cake mixes, homemade cakes, and store-bought cakes can all be used to create cake pops. Avoid using cakes that are extremely moist or that contain fruit, because when combined with frosting, the texture can become, for lack of a better word, gooey. Frosting: You can combine any flavor frosting with any flavor cake you like. Homemade frostings also work. If you’re using frosting with perishable ingredients, such as cream cheese, make sure you store finished treats in the refrigerator. If you’re using ready-made frosting, avoid the whipped varieties. Candy coating: Coatings are widely available in disc form but are also available in blocks. Wilton and Make ‘n Mold are popular brands that you can find in craft stores and even online. Merckens is another brand that is available online and in cake-supply stores. Grocery stores, such as Kroger, even carry their own brand of candy coating. Be aware that when ordering candy coating online during the summer months, your coating can arrive already melted. Don’t worry, though; you can still use it.
Candy coloring: Wilton and Chefmaster are just two makers of candy coloring. These colorings are oil based and do not contain water. Never use regular food coloring, which does contain water, because it will ruin your candy coating. Candy writers: Try these handy tubes of colored candy coating for smaller jobs. Just heat, following the directions on the package, and use right out of the tube. They’re quick, easy, and definitely not messy. Colors include black, brown, red, white, yellow, green, orange, and pink, to name a few. Candy flavoring oils: Use candy flavoring oils to add flavor to candy coatings. They are not a necessity by any means, but you may want to experiment for fun. Paramount crystals: This product is ideal for thinning candy coating. It’s available online from cake- and candy-supply Web sites and cake-supply stores. Shortening and even vegetable oil are also acceptable alternatives. Start by adding about a teaspoon per pound of coating until the coating is fluid enough for dipping. Edible add-ons: Sprinkles, candies, nuts, and cookies are fun ways to transform plain cake pops into party pops for every occasion. Edible-ink pens: Americolor Gourmet Writer is a popular brand of edible-ink pens. They come in packs of ten assorted colors, and a two-pack is also sold in black. Equipment You can make sensational treats with these simple tools. The following equipment is recommended for successful cake pops, cupcake pops, cake balls, and cupcake bites. Cake pan: Use a 9-by-13-inch cake pan. Buy one with a lid—it will come in handy if you choose to bake the cake the night before you dip and decorate. Mixer: You’ll need to have one of these on hand, unless you use a store-bought cake and frosting. Microwave: I couldn’t live without mine. You can melt candy coating colors as you need them if you have a microwave. Double boiler: Great for larger jobs, a double boiler can heat candy coating slowly, without letting the coating get too hot, but it is not a necessity. Cookie cutters: Use a small flower-shaped cutter to make cupcake pops. Cutters should be about 1¼ inches wide by ¾ inch deep. Larger cutters 1½ inches wide by ½ inch deep can be used to make flowers and hearts. Round cutters can be used to cut candy melts into shapes for decorating. Microwave-safe bowls: Durable plastic bowls (not melamine) are ideal for melting candy coating in the microwave. They are lightweight and can be held without burning your hands while dipping. Look for bowls that are narrow and deep. Small bowls like this will make dipping much easier and will allow you to work with less coating at a time. Wide bowls will require you to melt more coating to make it deep enough for dipping. If the coating starts to get too low in the bowl to dip properly, you can transfer the coating to a coffee mug or smaller microwave-safe container. This will help you get the most out of your candy coating. Mixing bowls and spoons: Large mixing bowls and metal spoons are used to mix the cake and frosting together. Lollipop sticks: Paper lollipop sticks are available in several different sizes and widths. I find the 6-inch length to be the most versatile for displaying. Styrofoam block: Use a block that’s at least 2 inches thick, so the cake pops can be inserted far enough that they won’t fall over. Poke holes about 2 inches apart in the top before you start dipping, so it will be ready when you need it. Do not poke the holes all the way through. A 12-by-18-inch block can hold 48 pops. Candy molds: These are sold in hundreds of shapes and sizes The projects in this book use candy cup molds, square molds, disc-shaped molds, and more. Familiarize yourself with what’s available and watch your creativity skyrocket. Baking sheets: Rimmed 12-by-18-inch baking sheets are large enough to hold 48 cake balls. However, smaller rimmed baking sheets are easy to slide in and out of the freezer or refrigerator—especially if you have a side-by-side model. Wax paper: Keep wax paper handy for lining baking sheets before resting cake balls, cupcake pops, and cupcake bites on them; it allows them to be removed easily. Toothpicks: These are extremely useful for touch-ups, dipping, and decorating. Small dishes for sprinkles: Pour sprinkles into a small dish so you can pinch a few to sprinkle on each pop. Pouring them from the container can result in too much waste. Squeeze bottles: Perfect for drizzling and decorating, squeeze bottles come in small, medium, and large sizes to meet every need. You can also pour melted candy coating into resealable plastic bags. Just snip the corner off the bag and squeeze the coating through the hole. Dish towels: Always have a dish towel handy, especially when making cupcake pops. Coating can get on your fingers easily with this method, and it’s better to wipe them on a dry dish towel than to risk getting water in your coating. Candy gloves: These are great if you are making cupcake bites. When holding the ridged cupcake bottoms formed by candy molds, your body heat can start to make impressions in the coating. Candy gloves can help prevent this. If you’re a quick dipper, don’t worry about having these around. Tweezers: Keep a pair on hand for use solely in the kitchen. They can be helpful when attaching small add-ons to a cake-pop surface. Warming tray: This is a great tool to have around if you make a lot of cake pops and use more than one color, but it’s not a necessity.
Sprinkles Sprinkles are so much fun. They come in tons of shapes, sizes, and colors. You’ll be surprised by how easily they can be used to give cake pops pizzazz and personality. Here are some of the most commonly used sprinkles featured in this book. Keep in mind that in many cases, the single-color sprinkles used in these projects are separated from a container of multicolored sprinkles. · Chocolate hearts mix · Colorsticks · Confetti sprinkles · Halloween confetti sprinkles · Jimmies (brown, orange, red) · Jumbo confetti sprinkles (peach) · Jumbo hearts (pink, red, white) · Jumbo stars (yellow) · Kissing lips · Miniature hearts · Multicolored diamonds · Multicolored hearts · Nonpareils · Oval sprinkles · Pastel sequins (also called miniature confetti sprinkles) · Pastel wildflowers · Poker shapes (black hearts) · Rainbow chip sprinkles · Sanding sugar · Sugar pearls Tip · I like to buy seasonal sprinkles and keep them on hand. For instance, around Halloween you can find black sprinkles, which may be more difficult to find at other times of the year.
Decorative Add-Ons Much like sprinkles, candy and other edible add-ons are fun to use for bringing life to your cake pops. Check out the candy aisle in your grocery store, drugstore, or even gas station. You’ll start to see candy in a whole new way, inspiring your very own cake pop creations. Candies · Candy-coated sunflower seeds · Candy necklace pieces · Caramel candy corn · Chocolate-coated espresso beans · Dark chocolate–coated espresso beans · French burnt peanuts · Fruit Roll-Ups · Hershey’s Kisses · Jelly beans · Junior Mints · Licorice belts · Licorice buttons · Licorice pastels · Life Savers · Life Savers Gummies · M&M’s · M&M’s Minis · Pastel candy corn · Rainbow Airheads Xtremes Sour Belts · Red Hots · Sour Punch Straws · Tic Tacs · Vanilla-coated espresso beans Food Items · Alphabet pretzels · Chocolate chips · Coconut · Japanese somen noodles · Miniature marshmallows · Mini Oreos · Oreos · Peanut butter chips · Pretzel sticks · Pretzel twists · Sugar cones · Teddy Grahams · White chocolate chips
Sprinkles: 1. Seasonal Halloween confetti sprinkles 2. Pastel wildflowers 3. Rainbow chip sprinkles 4. Multicolored jumbo heart sprinkles 5. Kissing Lips 6. Orange and brown jimmies 7. Colorstick sprinkles 8. Jumbo heart sprinkles 9. Chocolate Hearts Mix 10. Jumbo star sprinkles 11. Jumbo diamond sprinkles 12. Sugar pearls 13. Miniature pink heart sprinkles. 14. Multicolored heart sprinkles 15. Easter egg sprinkles 16. Poker Shapes 17. Sanding sugars 18. Miniature confetti sprinkles 19. Confetti sprinkles 20. Jumbo confetti sprinkles.
Candies: 1. Life Savers 2. Caramel candy corn 3. Pastel candy corn 4. Rainbow Airheads Xtremes Sour Belts 5. Life Saver Gummies 6. Licorice Bridge Mix (licorice buttons and pastels) 7. Jelly beans 8. Licorice Wheels 9. Tropical Chewy Lemonheads 10. Dark chocolate Hershey’s Kisses 11. Tic Tacs 12. French burnt peanuts 13. Candy necklaces 14. Licorice pastels 15. Chocolate-coated and dark chocolate–coated espresso beans 16. M&M’s 17. Gourmet Mints 18. Candy-coated sunflower seeds 19. Licorice belts 20. Seasonal Pink and Christmas M&M’s 21. Sour Punch Straws 22. M&M’s Minis
Food Items: 1. Chocolate chips 2. White chocolate chips 3. Miniature marshmallows 4. Oreos 5. Pecans 6. Butterscotch chips 7. Large chocolate chips 8. Teddy Grahams 9. Sugar Cones 10. Mini Oreos 11. Pretzel sticks 12. Coconut 13. Murray Sugar Free Chocolate Bites cookies
Cake Pop projects Tip · The ingredient quantities on the following pages are based on making 48 cake pops. Keep in mind that you don’t have to start off that big. Divide your cake into quarters, and use one quarter now and freeze the rest. Don’t forget to reduce the amount of frosting and decorations proportionally. A dozen cake pops are plenty for the beginner and a great way to start without feeling overwhelmed.
This section features dozens of ideas for decorating cake pops. From simple to show-stopping, they are some of the cutest treats on a stick. You’ll be amazed at how easily sprinkles and candy pieces can transform average shapes into unique cake creations. Bunnies, monsters, flowers, clowns—there’s no limit. The cake pops included here are just a starting point. I hope they inspire you to unleash your creativity and make something unique. You’ll surprise yourself by what you are capable of. I know I did. Whether you use a mix, bake from scratch, or purchase a store-bought cake to play with, these ideas are about having sweet fun. So grab some cake and frosting, pick up some candy coating and lollipop sticks, and let’s get started.
Sweet Hearts
Nothing says Happy Valentine’s Day better than sweetheart messages. Use a red edible-ink pen to express your love. Or maybe even just a “bite me” for fun. You’ll need 48 uncoated Basic Cake Balls Metal heart-shaped cookie cutter, 1½ inches wide 16 ounces yellow candy coating 16 ounces pink candy coating 16 ounces light green candy coating 3 deep, microwave-safe plastic bowls 48 paper lollipop sticks Styrofoam block Red edible-ink pen
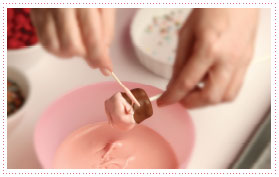
To decorate Remove the cake balls from the refrigerator and press them, one at a time, into a small heart-shaped cookie cutter to form the shape, or if you are adventurous, shape them by hand. They should be about 1½ inches wide and ½ inch deep. After shaping, put the heart-shaped cakes in the freezer for about 15 minutes to firm them up again for dipping. Once they are firm, transfer them to the refrigerator. Remove a few at a time for dipping, keeping the rest chilled. Melt each color of candy coating in a separate microwave-safe plastic bowl, following the instructions on the packages. The coating should be about 3 inches deep for easier dipping. Work with one color at a time before moving on to the next. (You should be able to get 16 heart-shaped cake pops from each pound of candy coating.) One at a time, dip about ½ inch of the tip of a lollipop stick into the melted candy coating, and insert the stick straight into the bottom of a heart-shaped cake, pushing it no more than halfway through. Dip the cake pop into the melted coating, and tap off any excess coating, as described in Dipping Methods. Let the pops dry in the Styrofoam block. When they are completely dry, use a red edible-ink pen to write sweet notes on one side of each cake pop. Return the pops to the Styrofoam block and let the ink dry completely. Tip · You can also use yellow M&M’s or similarly shaped candy instead of gourmet mints for the flowers. However, the mints have a rounder surface similar to that of the licorice pastels.
Spring Fling Butterfly- and flower-shaped cookie cutters provide an easy way to achieve distinctive shapes. You’ll need 48 uncoated Basic Cake Balls Flower-shaped cookie cutter (1½ inches wide by ¾ inch deep) Butterfly-shaped cookie cutter (1½ inches wide by ¾ inch deep) 48 ounces (3 pounds) white candy coating Deep, microwave-safe plastic bowl 48 paper lollipop sticks 24 licorice pastels 24 yellow gourmet mints, or similar candy Styrofoam block Toothpicks 216 pastel confetti sprinkles (for flowers and butterflies) 48 jumbo heart sprinkles (for 24 butterflies) 48 rainbow colorstick sprinkles (for 24 butterflies) To decorate Mold half of the cake balls using a small flower-shaped cookie cutter and the other half using a small butterfly-shaped cookie cutter. Press the cake mixture into the cookie cutter until it fills up the shape. After shaping, put the cake balls in the freezer for about 15 minutes to firm up again for dipping. Once they are firm, transfer them to the refrigerator. Melt the white candy coating in a microwave-safe plastic bowl, following the instructions on the package. The coating should be about 3 inches deep for easier dipping. (I usually work with about 16 ounces of coating at a time.) When you are ready to dip, remove a few shaped cake balls at a time from the refrigerator, keeping the rest chilled. One at a time, dip about ½ inch of the tip of a lollipop stick into the melted candy coating, and insert the stick straight into the bottom of a butterfly- or flower-shaped cake ball, pushing it no more than halfway through. Dip the cake pop into the melted coating, and tap off any excess, as described in Dipping Methods. Before the coating sets, attach 1 licorice pastel to the front side of each butterfly and 1 yellow gourmet mint to the front of each flower. Let dry in the Styrofoam block. For the flowers, use a toothpick to dot a small amount of melted coating to the fronts of the cake pops, so you can attach 1 confetti sprinkle on each flower petal. For the butterflies, use a toothpick to dot a small amount of coating on the front of the cake pops so you can attach jumbo heart sprinkles and confetti sprinkles on each butterfly wing. Then insert 2 colorstick sprinkles in matching colors in the hardened coating on the top for antennae. For an added detail, dot coating around the butterfly shape with a toothpick to define the wings. Let dry completely in the Styrofoam block.
Spring Chicks
These adorable spring chicks are just the treat to add some pop to your Easter celebration. You’ll need 48 uncoated Basic Cake Balls 48 ounces (3 pounds) yellow candy coating Deep, microwave-safe plastic bowl 48 paper lollipop sticks Styrofoam block Toothpicks 48 orange rainbow chip sprinkles 96 yellow rainbow chip sprinkles 96 orange wildflower sprinkles Black edible-ink pen
Tip · Try ditching the sticks. The chicks are pretty cute without them. Just form a cake ball into a pear shape and drop it into a bowl of melted candy coating. Cover it with the coating without moving or stirring it around in the bowl. Then lift it from the coating with a spoon using Dipping Methods.
To decorate Have the cake balls chilled and in the refrigerator. Melt the candy coating in a microwave-safe plastic bowl, following the instructions on the package. The coating should be about 3 inches deep for easier dipping. (I usually work with about 16 ounces of coating at a time.) When you are ready to dip, remove a few cake balls at a time from the refrigerator, keeping the rest chilled. One at a time, dip about ½ inch of the tip of a lollipop stick into the melted candy coating, and insert the stick straight into a cake ball, pushing it no more than halfway through. Dip the cake pop into the melted coating, and tap off any excess coating, as described in Dipping Methods. Let dry completely in the Styrofoam block. When the pops are dry, use a toothpick to dot a small amount of melted candy coating in position for the beak, and attach an orange rainbow chip sprinkle pointed-side out. Use the same technique to attach 2 yellow rainbow chips for wings, pointed-side out, on either side of the cake pop and 2 orange flower sprinkles at the bottom for feet. Draw eyes with a black edible-ink pen, and let dry completely in the Styrofoam block.
Pastel Bunny Pops
You’ll need 48 uncoated Basic Cake Balls, formed into rounded triangular shapes 48 ounces (3 pounds) pink or white candy coating Deep, microwave-safe plastic bowl 48 paper lollipop sticks Styrofoam block Round cookie cutter 96 pieces pastel candy corn Toothpicks 48 pink jumbo heart sprinkles 96 white confetti sprinkles Blue edible-ink pen Black edible-ink pen Pink edible-ink pen
To decorate Have the cake balls chilled and in the refrigerator. Melt the candy coating in a microwave-safe plastic bowl, following the instructions on the package. The coating should be about 3 inches deep for easier dipping. (I usually work with about 16 ounces of coating at a time.) When you are ready to dip, remove a few of the cake balls at a time from the refrigerator, keeping the rest chilled. One at a time, dip about ½ inch of the tip of a lollipop stick into the melted candy coating, and insert the stick straight into the larger, bottom side of a shaped cake ball, pushing it no more than halfway through. Dip the cake pop into the melted coating, and tap off any excess coating, as described in Dipping Methods. Place in the Styrofoam block to dry. For the ears, use a cookie cutter with a curved edge to cut off the tips of the candy corn. Dip the cut end of each candy corn piece in a little bit of the melted candy coating and attach it to the top of a bunny head. Hold the ears in place for a few seconds until the candy coating sets like glue, and place in the Styrofoam block to dry completely. Use a toothpick to dot a small amount of melted candy coating in position for the nose, and attach 1 pink jumbo heart sprinkle. Hold it in place until set. Use the same technique to apply white confetti sprinkles for the eyes, and let dry. Draw eye details on the confetti sprinkles with blue and black edible-ink pens. Draw the mouths with a pink edible-ink pen. Let the pops dry completely. Tips · When sprinkling the sugar pearls, work over a large bowl, because these tiny balls will bounce everywhere. You can also reuse the ones that fall into the bowl. · You can also use soft edible pearls found in cake supply stores for an easier bite.
Sugar Sheep Sugar pearls for wool make these sheep look so sweet. Be careful before you bite too hard, though. Sugar pearls are crunchy. You’ll need 48 uncoated Basic Cake Balls, formed into oval shapes 48 ounces (3 pounds) white candy coating Deep, microwave-safe plastic bowl 48 paper lollipop sticks Styrofoam block Licorice bridge mix (48 licorice buttons for heads and 96 licorice pastels cut in half for legs) Sugar pearls Toothpicks 48 tiny pink heart sprinkles 96 brown rainbow chip sprinkles
To decorate Have the cake balls chilled and in the refrigerator. Melt the white candy coating in a microwave-safe plastic bowl, following the instructions on the package. The coating should be about 3 inches deep for easier dipping. (I usually work with about 16 ounces of coating at a time.) When you are ready to dip, remove a few cake balls at a time from the refrigerator, keeping the rest chilled. One at a time, dip about ½ inch of the tip of a lollipop stick into the melted candy coating, and insert the stick straight into the side of an oval cake ball, pushing it no more than halfway through. Dip the cake pop into the melted coating, and tap off any excess coating, as described in Dipping Methods. Immediately attach 1 licorice button in position for the head and 4 pastel leg pieces by pushing them into the bottom, and sprinkle sugar pearls on the coating before it sets. If the coating is too hot, the attachments will slide off. If it has cooled for too long, the coating will set before you can finish attaching everything. But don’t worry: if that happens, reheat the coating and use it as a glue to attach any remaining pieces. Let dry completely in the Styrofoam block. For the face, use a toothpick to place tiny dots of melted white coating on the licorice-button heads for eyes. Using a toothpick, apply a dot of melted coating in position for the nose, and attach a tiny pink heart sprinkle. Use the same technique to apply brown rainbow chip sprinkles for ears. Let dry completely in the Styrofoam block.
Date: 2016-01-14; view: 625
|