CATEGORIES:
BiologyChemistryConstructionCultureEcologyEconomyElectronicsFinanceGeographyHistoryInformaticsLawMathematicsMechanicsMedicineOtherPedagogyPhilosophyPhysicsPolicyPsychologySociologySportTourism
B ... and remove the collets as described
I Refer to Tools and Workshop Tips for details of gasket removal methods.
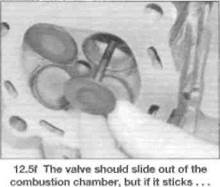
5Compress the valve spring on the first valve with a spring compressor, making sure it is correctly located onto each end of the valve assembly (see illustration).Do not compress the springs any more than is absolutely necessary and take care not to mark the surface of the cam follower hole with the spring compressor. Remove the collets, using either needle-nose pliers, tweezers, a magnet or a screwdriver with a dab of grease on it (see illustration).Carefully release the valve spring compressor and remove the spring retainer, noting which way up it fits, the spring, the spring seat, and the valve from the head (see illustrations).If the valve binds in the guide (won't pull through), push it back 2»18 Engine, clutch and transmission
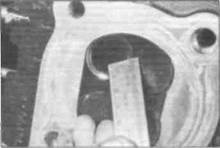
I2.5e... and the valve spring seat into the head and deburr the area around the collet groove with a very fine file or whetstone (see illustration).
6Repeat the procedure for the remaining valves. Remember to keep the parts for each valve together and separate from the other valves so they can be reinstalled in the same location. 7 Once the valves have been removed and labelled, pull the valve stem seals off the top of the valve guides with pliers and discard them (see illustration).The old seals should not be reused. 8 Next, clean the cylinder head with solvent and dry it thoroughly. Compressed air will speed the drying process and ensure that all holes and recessed areas are clean. 9 Clean all the valve springs, collets, retainers and spring seats with solvent and dry them
thoroughly. Clean the parts from one valve at a time so that no mixing of parts between valves occurs. 10 Scrape off any deposits that may have Inspection 11Inspect the head very carefully for cracks and other damage. If cracks are found, a new head will be required. Check the cam bearing surfaces for wear and evidence of seizure. Check the camshafts for wear as well (see Section 9). 12Inspect the outer surfaces of the cam followers for evidence of scoring or other damage. If a follower is in poor condition, it is
Date: 2016-01-14; view: 785
|