CATEGORIES:
BiologyChemistryConstructionCultureEcologyEconomyElectronicsFinanceGeographyHistoryInformaticsLawMathematicsMechanicsMedicineOtherPedagogyPhilosophyPhysicsPolicyPsychologySociologySportTourism
Huggable Bear Pattern (Printer-friendly version)Table of Contents
Huggable Bear Pattern v Full photo-filled version (pgs. 2-6) Ø Materials, abbreviation key, and notes (pg. 2) Ø Full-length pattern (pgs. 3-6) v Printer-friendly version: no photos (pgs. 7-10)
Huggable Koala Pattern v Full photo-filled version (pgs. 11-15) Ø Materials, abbreviation key, and notes (pg. 11) Ø Full-length pattern (pgs. 12-15)
Extra Information
Happy crocheting! J
What you’ll need: ♥ Worsted-weight yarn in the following colors: Color A (390 yds) – brown Color B (2 yds) - blue ♥ F/5 (3.75mm) crochet hook ♥ Two 18mm plastic safety eyes with plastic washers ♥ One 25mm plastic safety nose with plastic washer ♥ Tan craft felt for belly and snout ♥ Poly-Filor any stuffing of your choice ♥ Yarn needle for finishing ♥ Fabricglue Abbreviation key:
Notes: Gauge: Specific gauge is not extremely important. Proportions will be correct if consistent tension is maintained. ♥ All body parts are crocheted in a spiral, not in joint rounds. Use something to mark the first stitch of a round, and move it up as you work. ♥ “The Magic Circle” is used to start each piece. If you do not prefer this technique, you can start each piece using the following technique: ch 2, then sc x6 into the second chain away from the hook. Sl st to join the round. This creates Round 1. ♥ For this model, I used Loops and Threads Impeccable yarn
Preparation: Cut tan craft felt pieces into the shapes display Shapes are not proportional in relation to each other:
Snout: 2.75” wide & 2.25” tall
Cut a slit into the snout about
Belly:
 2.5” wide 2.5” wide
& 3.25” tall
Head: Using Color A, Round 1: Magic Circle with a base of 6 stitches Round 2: inc x6= 12 sts Round 3: (1 inc, sc in next st) x6 = 18 sts Round 4: (1 inc, sc in next 2 sts) x6 = 24 sts Round 5: (1 inc, sc in next 3 sts) x6 = 30 sts Round 6: (1 inc, sc in next 4 sts) x6 = 36 sts Round 7: (1 inc, sc in next 5 sts) x6 = 42 sts Round 8: (1 inc, sc in next 6 sts) x6 = 48 sts Round 9: (1 inc, sc in next 7 sts) x6 = 54 sts Round 10: (1 inc, sc in next 8 sts) x6 = 60 sts Round 11: (1 inc, sc in next 9 sts) x6 = 66 sts Round 12: (1 inc, sc in next 10 sts) x6 = 72 sts Round 13: (1 inc, sc in next 11 sts) x6 = 78 sts Round 14: (1 inc, sc in next 12 sts) x6 = 84 sts Round 15: (1 inc, sc in next 13 sts) x6 = 90 sts Round 16: (1 inc, sc in next 14 sts) x6 = 96 sts Round 17: (1 inc, sc in next 15 sts) x6 = 102 sts Round 18: (1 inc, sc in next 16 sts) x6 = 108 sts Round 19: (1 inc, sc in next 17 sts) x6 = 114 sts Round 20: (1 inc, sc in next 18 sts) x6 = 120 sts Round 21: (1 inc, sc in next 19 sts) x6 = 126 sts Round 22: (1 inc, sc in next 20 sts) x6 = 132 sts Round 23-26: sc in the next 132 sts = 132 sts Round 27: (Mark this round before continuing) (1 dec, sc in next 20 sts) x6 = 126 sts Round 28: (1 dec, sc in next 19 sts) x6 = 120 sts Round 29: (1 dec, sc in next 18 sts) x6 = 114 sts Round 30: (1 dec, sc in next 17 sts) x6 = 108 sts Round 31: (1 dec, sc in next 16 sts) x6 = 102 sts Round 32: (1 dec, sc in next 15 sts) x6 = 96 sts Round 33: (1 dec, sc in next 14 sts) x6 = 90 sts Round 34: (1 dec, sc in next 13 sts) x6 = 84 sts Round 35: (1 dec, sc in next 12 sts) x6 = 78 sts Round 36: (1 dec, sc in next 11 sts) x6 = 72 sts Round 37: (1 dec, sc in next 10 sts) x6 = 66 sts Round 38: (1 dec, sc in next 9 sts) x6 = 60 sts Round 39: (1 dec, sc in next 8 sts) x6 = 54 sts
Continue crocheting the head: Round 40: (1 dec, sc in next 7 sts) x6 = 48 sts Round 41: (1 dec, sc in next 6 sts) x6 = 42 sts Round 42: (1 dec, sc in next 5 sts) x6 = 36 sts
Begin stuffing the head with PolyFil and continue stuffing as you go.
*Helpful tip: Stuff the head with A LOT of stuffing! When you think you’ve stuffed enough, stuff some more! This will help you round out the 6 corners that were created from increasing and decreasing, thus smoothing out the shape of the head.
Round 43: (1 dec, sc in next 4 sts) x6 = 30 sts Round 44: (1 dec, sc in next 3 sts) x6 = 24 sts Round 45: (1 dec, sc in next 2 sts) x6 = 18 sts Round 46: (1 dec, sc in next st) x6 = 12 sts Round 47: dec x6= 6 sts Fasten off and leave a 12” tail. Use the tail to sew the head shut,
Work on face: Pick up the tan felt face you prepared earlier. The nose should already be inserted into the felt. Insert the nose into any space between Rounds 27 and 28. Then insert each eye about 6 sts to the left and right of the snout.
Using Color A, Round 1: Magic Circle with a base of 6 stitches Round 2: inc x6= 12 sts Round 3: (1 inc, sc in next st) x6 = 18 sts Round 4: (1 inc, sc in next 2 sts) x6 = 24 sts Round 5: (1 inc, sc in next 3 sts) x6 = 30 sts Round 6: (1 inc, sc in next 4 sts) x6 = 36 sts Round 7: sc in the next 36 sts = 36 sts Round 8: (1 dec, sc in next 4 sts) x6 = 30 sts Round 9: (1 dec, sc in next 3 sts) x6 = 24 sts Round 10: (1 dec, sc in next 2 sts) x6 = 18 sts Round 11: (1 dec, sc in next st) x6 = 12 sts Round 12: dec x6= 6 sts Fasten off and leave a 12” tail. Ears do not need to be stuffed. Use the tail to sew the ears shut, and then sew the ears to the head.
Body: Using Color A,
Round 2: inc x6= 12 sts Round 3: (1 inc, sc in next st) x6 = 18 sts Round 4: (1 inc, sc in next 2 sts) x6 = 24 sts Round 5: (1 inc, sc in next 3 sts) x6 = 30 sts Round 6: (1 inc, sc in next 4 sts) x6 = 36 sts Round 7: (1 inc, sc in next 5 sts) x6 = 42 sts Round 8: (1 inc, sc in next 6 sts) x6 = 48 sts Round 9: (1 inc, sc in next 7 sts) x6 = 54 sts Round 10: sc in the next 54 sts = 54 sts Round 11: (1 dec, sc in next 7 sts) x6 = 48 sts Round 12-13: sc in the next 48 sts = 48 sts Round 14: (1 dec, sc in next 6 sts) x6 = 42 sts Round 15-16: sc in the next 42 sts = 42 sts Round 17: (1 dec, sc in next 5 sts) x6 = 36 sts Round 18-19: sc in the next 36 sts = 36 sts Round 20: (1 dec, sc in next 4 sts) x6 = 30 sts Round 21-23: sc in the next 30 sts = 30 sts Round 24: (1 dec, sc in next 3 sts) x6 = 24 sts Fasten off and leave an 18” tail. Stuff body with a lot of PolyFil until the body is stiff. This will help the body support the weight of the head. Center the body over Round 47 on the head and then use the yarn tail to sew the body to the head. Stuff the body with more Poly-Fil as you go.
Glue on the felt belly, but leave a small bit of the belly unglued in the bottom right-hand corner. This is where the heart will be located.
Using Color A, Round 1: Magic Circle with a base of 6 stitches Round 2: inc x6= 12 sts Round 3: (1 inc, sc in next st) x6 = 18 sts Round 4: (1 inc, sc in next 2 sts) x6 = 24 sts Round 5: (1 inc, sc in next 3 sts) x6 = 30 sts Round 6: (1 inc, sc in next 4 sts) x6 = 36 sts Round 7: (1 inc, sc in next 5 sts) x6 = 42 sts Round 8: sc in the next 42 sts = 42 sts Round 9: (1 dec, sc in next 5 sts) x6 = 36 sts Round 10: sc in the next 36 sts = 36 sts Round 11: (1 dec, sc in next 4 sts) x6 = 30 sts Round 12-13: sc in the next 30 sts = 30 sts Stuff bear’s hands with Poly-Fil. After hands are stuffed, you do not need to stuff the rest of the arm. Round 14: (1 dec, sc in next 3 sts) x6 = 24 sts Round 15-16: sc in the next 24 sts = 24 sts Round 17: (1 dec, sc in next 2 sts) x6 = 18 sts Round 18-30: sc in the next 18 sts = 18 sts
Legs (make 2): Using Color A, Round 1: Magic Circle with a base of 6 stitches Round 2: inc x6= 12 sts Round 3: (1 inc, sc in next st) x6 = 18 sts Round 4: (1 inc, sc in next 2 sts) x6 = 24 sts Round 5: (1 inc, sc in next 3 sts) x6 = 30 sts Round 6: (1 inc, sc in next 4 sts) x6 = 36 sts Round 7: (1 inc, sc in next 5 sts) x6 = 42 sts Round 8: (1 inc, sc in next 6 sts) x6 = 48 sts Round 9: sc in the next 48 sts = 48 sts Round 10: (1 dec, sc in next 6 sts) x6 = 42 sts Round 11: sc in the next 42 sts = 42 sts Round 12: (1 dec, sc in next 5 sts) x6 = 36 sts Round 13-14: sc in the next 36 sts = 36 sts Round 15: (1 dec, sc in next 4 sts) x6 = 30 sts Round 16-18: sc in the next 30 sts = 30 sts Round 19: (1 dec, sc in next 3 sts) x6 = 24 sts Stuff bear’s feet with Poly-Fil. After feet are stuffed, you do not need to stuff the rest of the leg. CONTINUE leg on on the next page:
Continue crocheting leg: Round 20-23: sc in the next 24 sts = 24 sts Round 24: (1 dec, sc in next 2 sts) x6 = 18 sts Round 25-32: sc in the next 18 sts = 18 sts Fasten off and leave a 12” tail. Flatten the opening of the leg by pinching it, then sew it shut with your yarn tail. Use the tail to sew the leg in place.
Tail: Using Color A, Round 1: Magic Circle with a base of 6 stitches Round 2: inc x6= 12 sts Round 3: (1 inc, sc in next st) x6 = 18 sts Round 4: (1 inc, sc in next 2 sts) x6 = 24 sts Round 5-6: sc in the next 24 sts = 24 sts Round 7: (1 dec, sc in next 2 sts) x6 = 18 sts Round 8: (1 dec, sc in next st) x6 = 12 sts Fasten off and leave a 12” tail. Stuff the bear’s tail with Poly-Fil. Use the yarn tail to sew the tail to your bear’s buttocks. J
Heart applique:
Example: “2 tr, 1 dc, 1 hdc” means “2tr into first
Using Color B, Round 1: Magic Circle with a base of 7 stitches Round 2: ch 3 & 2 tr, 1 dc, 1 hdc, ch 1 & 1 dc, ch 1 & 1 hdc, 1 dc, 2 tr. Ch 3 & sl st to join with the base of the first st. Fasten off and leave a 10” tail. Use this tail to sew the heart applique onto the bear’s body, going through the spot of felt that you did not glue down earlier.
AND YOU’RE FINALLY FINISHED!!! Celebrate by giving your bear a good squeeze. J
Huggable Bear Pattern (Printer-friendly version)
What you’ll need: ♥ Worsted-weight yarn in the following colors: Color A (390 yds) – brown Color B (2 yds) - blue ♥ F/5 (3.75mm) crochet hook ♥ Two 18mm plastic safety eyes with plastic washers ♥ One 25mm plastic safety nose with plastic washer ♥ Tan craft felt for belly and snout ♥ Poly-Filor any stuffing of your choice ♥ Yarn needle for finishing ♥ Fabricglue
Abbreviation key: ♥ sc single crochet ♥ st/sts stitch/stitches ♥ dec decrease(join the next 2 sts into 1) ♥ inc increase (2 sc in the next st) ♥ slst slipstitch Size of finished bear: Approximately 15 inches tall: Depending on the tension, yarn, and hook you use, your reindeer may turn out to be slightly larger or smaller than mine.
Gauge: Specific gauge is not extremely important. Proportions will be correct if consistent tension is maintained.
Notes: ♥ All body parts are crocheted in a spiral, not in joint rounds. Use something to mark the first stitch of a round, and move it up as you work. ♥ “The Magic Circle” is used to start each piece. If you do not prefer this technique, you can start each piece using the following technique: ch 2, then sc x6 into the second chain away from the hook. Sl st to join the round. This creates Round 1. ♥ For this model, I used Loops and Threads Impeccableyarn Preparation: Cut tan craft felt pieces into the shapes displayed below. Shapes are not proportional in relation to each other:
Snout: 2.75” wide & 2.25” tall
Cut a slit into the snout about
Belly: 2.5” wide
Bear & Koala Designed by Josephine Wu from A Morning Cup of Jo Creations
Head:
Round 1: Magic Circle with a base of 6 stitches Round 2: inc x6= 12 sts Round 3: (1 inc, sc in next st) x6 = 18 sts Round 4: (1 inc, sc in next 2 sts) x6 = 24 sts Round 5: (1 inc, sc in next 3 sts) x6 = 30 sts Round 6: (1 inc, sc in next 4 sts) x6 = 36 sts Round 7: (1 inc, sc in next 5 sts) x6 = 42 sts Round 8: (1 inc, sc in next 6 sts) x6 = 48 sts Round 9: (1 inc, sc in next 7 sts) x6 = 54 sts Round 10: (1 inc, sc in next 8 sts) x6 = 60 sts Round 11: (1 inc, sc in next 9 sts) x6 = 66 sts Round 12: (1 inc, sc in next 10 sts) x6 = 72 sts Round 13: (1 inc, sc in next 11 sts) x6 = 78 sts Round 14: (1 inc, sc in next 12 sts) x6 = 84 sts Round 15: (1 inc, sc in next 13 sts) x6 = 90 sts Round 16: (1 inc, sc in next 14 sts) x6 = 96 sts Round 17: (1 inc, sc in next 15 sts) x6 = 102 sts Round 18: (1 inc, sc in next 16 sts) x6 = 108 sts Round 19: (1 inc, sc in next 17 sts) x6 = 114 sts Round 20: (1 inc, sc in next 18 sts) x6 = 120 sts Round 21: (1 inc, sc in next 19 sts) x6 = 126 sts Round 22: (1 inc, sc in next 20 sts) x6 = 132 sts Round 23-26: sc in the next 132 sts = 132 sts Round 27: (Mark this round before continuing) (1 dec, sc in next 20 sts) x6 = 126 sts Round 28: (1 dec, sc in next 19 sts) x6 = 120 sts Round 29: (1 dec, sc in next 18 sts) x6 = 114 sts Round 30: (1 dec, sc in next 17 sts) x6 = 108 sts Round 31: (1 dec, sc in next 16 sts) x6 = 102 sts Round 32: (1 dec, sc in next 15 sts) x6 = 96 sts Round 33: (1 dec, sc in next 14 sts) x6 = 90 sts Round 34: (1 dec, sc in next 13 sts) x6 = 84 sts Round 35: (1 dec, sc in next 12 sts) x6 = 78 sts Round 36: (1 dec, sc in next 11 sts) x6 = 72 sts Round 37: (1 dec, sc in next 10 sts) x6 = 66 sts Round 38: (1 dec, sc in next 9 sts) x6 = 60 sts Round 39: (1 dec, sc in next 8 sts) x6 = 54 sts
Work on face: Pick up the tan felt face you prepared earlier. The nose should already be inserted into the felt. Insert the nose into any space between Rounds 27 and 28. Then insert each eye about 6 sts to the left and right of the snout. Continue crocheting the head: Round 40: (1 dec, sc in next 7 sts) x6 = 48 sts Round 41: (1 dec, sc in next 6 sts) x6 = 42 sts Round 42: (1 dec, sc in next 5 sts) x6 = 36 sts
Begin stuffing the head with PolyFil and continue stuffing as you go.
*Helpful tip: Stuff the head with A LOT of stuffing! When you think you’ve stuffed enough, stuff some more! This will help you round out the 6 corners that were created from increasing and decreasing, thus smoothing out the shape of the head.
Round 43: (1 dec, sc in next 4 sts) x6 = 30 sts Round 44: (1 dec, sc in next 3 sts) x6 = 24 sts Round 45: (1 dec, sc in next 2 sts) x6 = 18 sts Round 46: (1 dec, sc in next st) x6 = 12 sts Round 47: dec x6= 6 sts Fasten off and leave a 12” tail. Use the tail to sew the head shut, and then use this yarn tail to sew a little line underneath the bear’s nose. Weave the rest of the yarn into the head hide the tail. Use fabric glue to fasten the felt snout in place.
Ears (make 2): Using Color A, Round 1: Magic Circle with a base of 6 stitches Round 2: inc x6= 12 sts Round 3: (1 inc, sc in next st) x6 = 18 sts Round 4: (1 inc, sc in next 2 sts) x6 = 24 sts Round 5: (1 inc, sc in next 3 sts) x6 = 30 sts Round 6: (1 inc, sc in next 4 sts) x6 = 36 sts Round 7: sc in the next 36 sts = 36 sts Round 8: (1 dec, sc in next 4 sts) x6 = 30 sts Round 9: (1 dec, sc in next 3 sts) x6 = 24 sts Round 10: (1 dec, sc in next 2 sts) x6 = 18 sts Round 11: (1 dec, sc in next st) x6 = 12 sts Round 12: dec x6= 6 sts Fasten off and leave a 12” tail. Ears do not need to be stuffed. Use the tail to sew the ears shut, and then sew the ears to the head. Body: Using Color A, Round 1: Magic Circle with a base of 6 stitches Round 2: inc x6= 12 sts Round 3: (1 inc, sc in next st) x6 = 18 sts Round 4: (1 inc, sc in next 2 sts) x6 = 24 sts Round 5: (1 inc, sc in next 3 sts) x6 = 30 sts Round 6: (1 inc, sc in next 4 sts) x6 = 36 sts Round 7: (1 inc, sc in next 5 sts) x6 = 42 sts Round 8: (1 inc, sc in next 6 sts) x6 = 48 sts Round 9: (1 inc, sc in next 7 sts) x6 = 54 sts Round 10: sc in the next 54 sts = 54 sts Round 11: (1 dec, sc in next 7 sts) x6 = 48 sts Round 12-13: sc in the next 48 sts = 48 sts Round 14: (1 dec, sc in next 6 sts) x6 = 42 sts Round 15-16: sc in the next 42 sts = 42 sts Round 17: (1 dec, sc in next 5 sts) x6 = 36 sts Round 18-19: sc in the next 36 sts = 36 sts Round 20: (1 dec, sc in next 4 sts) x6 = 30 sts Round 21-23: sc in the next 30 sts = 30 sts Round 24: (1 dec, sc in next 3 sts) x6 = 24 sts Fasten off and leave an 18” tail. Stuff body with a lot of PolyFil until the body is stiff. This will help the body support the weight of the head. Center the body over Round 47 on the head and then use the yarn tail to sew the body to the head. Stuff the body with more Poly-Fil as you go.
Glue on the felt belly, but leave a small bit of the belly unglued in the bottom right-hand corner. This is where the heart will be located.
Arms (make 2): Using Color A, Round 1: Magic Circle with a base of 6 stitches Round 2: inc x6= 12 sts Round 3: (1 inc, sc in next st) x6 = 18 sts Round 4: (1 inc, sc in next 2 sts) x6 = 24 sts Round 5: (1 inc, sc in next 3 sts) x6 = 30 sts Round 6: (1 inc, sc in next 4 sts) x6 = 36 sts Round 7: (1 inc, sc in next 5 sts) x6 = 42 sts Round 8: sc in the next 42 sts = 42 sts Round 9: (1 dec, sc in next 5 sts) x6 = 36 sts Round 10: sc in the next 36 sts = 36 sts Round 11: (1 dec, sc in next 4 sts) x6 = 30 sts Round 12-13: sc in the next 30 sts = 30 sts Stuff bear’s hands with Poly-Fil. After hands are stuffed, you do not need to stuff the rest of the arm.
Continue crocheting arm: Round 14: (1 dec, sc in next 3 sts) x6 = 24 sts Round 15-16: sc in the next 24 sts = 24 sts Round 17: (1 dec, sc in next 2 sts) x6 = 18 sts Round 18-30: sc in the next 18 sts = 18 sts Fasten off and leave a 12” tail. Flatten the opening of the arm by pinching it, then sew it shut with your yarn tail. Use the tail to sew the arm into the crevice where the head meets the body.
Legs (make 2): Using Color A, Round 1: Magic Circle with a base of 6 stitches Round 2: inc x6= 12 sts Round 3: (1 inc, sc in next st) x6 = 18 sts Round 4: (1 inc, sc in next 2 sts) x6 = 24 sts Round 5: (1 inc, sc in next 3 sts) x6 = 30 sts Round 6: (1 inc, sc in next 4 sts) x6 = 36 sts Round 7: (1 inc, sc in next 5 sts) x6 = 42 sts Round 8: (1 inc, sc in next 6 sts) x6 = 48 sts Round 9: sc in the next 48 sts = 48 sts Round 10: (1 dec, sc in next 6 sts) x6 = 42 sts Round 11: sc in the next 42 sts = 42 sts Round 12: (1 dec, sc in next 5 sts) x6 = 36 sts Round 13-14: sc in the next 36 sts = 36 sts Round 15: (1 dec, sc in next 4 sts) x6 = 30 sts Round 16-18: sc in the next 30 sts = 30 sts Round 19: (1 dec, sc in next 3 sts) x6 = 24 sts Stuff bear’s feet with Poly-Fil. After feet are stuffed, you do not need to stuff the rest of the leg.
Continue crocheting leg: Round 20-23: sc in the next 24 sts = 24 sts Round 24: (1 dec, sc in next 2 sts) x6 = 18 sts Round 25-32: sc in the next 18 sts = 18 sts Fasten off and leave a 12” tail. Flatten the opening of the leg by pinching it, then sew it shut with your yarn tail. Use the tail to sew the leg in place.
Tail: Using Color A, Round 1: Magic Circle with a base of 6 stitches Round 2: inc x6= 12 sts Round 3: (1 inc, sc in next st) x6 = 18 sts Round 4: (1 inc, sc in next 2 sts) x6 = 24 sts Round 5-6: sc in the next 24 sts = 24 sts Round 7: (1 dec, sc in next 2 sts) x6 = 18 sts Round 8: (1 dec, sc in next st) x6 = 12 sts Fasten off and leave a 12” tail. Stuff the bear’s tail with Poly-Fil. Use the yarn tail to sew the tail to your bear’s buttocks. J
Heart applique: *Note: Each comma represents “in the next stitch.” Example: “2 tr, 1 dc, 1 hdc” means “2tr into first stitch. 1 dc in the next stitch. 1 hdc in the next stitch.”
Using Color B, Round 1: Magic Circle with a base of 7 stitches Round 2: ch 3 & 2 tr, 1 dc, 1 hdc, ch 1 & 1 dc, ch 1 & 1 hdc, 1 dc, 2 tr. Ch 3 & sl st to join with the base of the first st. Fasten off and leave a 10” tail. Use this tail to sew the heart applique onto the bear’s body, going through the spot of felt that you did not glue down earlier.
AND YOU’RE FINALLY FINISHED!!! Celebrate by giving your bear a good squeeze. J
What you’ll need: ♥ Worsted-weight yarn in the following colors: Color A (390 yds) – grey Color B (15 yds) – dark grey Color C (40 yds) – white Color D (2 yds) – light green ♥ F/5 (3.75mm) crochet hook ♥ Two 18mm plastic safety eyes with plastic washers ♥ White craft felt for belly and chin ♥ Poly-Filor any stuffing of your choice ♥ Yarn needle for finishing ♥ Fabricglue Abbreviation key: ♥ sc single crochet ♥ st/sts stitch/stitches ♥ dec decrease(join the next 2 sts into 1)
♥ inc increase (2 sc in the next st) ♥ slst slipstitch ♥ hdc half double crochet ♥ dc double crochet ♥ tr triple crochet
Notes: Size of finished koala: Approximately 15 inches tall: Depending on the tension, yarn, and hook you use, your reindeer may turn out to be slightly larger or smaller than mine.
Gauge: Specific gauge is not extremely important. Proportions will be correct if consistent tension is maintained. ♥ All body parts are crocheted in a spiral, not in joint rounds. Use something to mark the first stitch of a round, and move it up as you work. ♥ “The Magic Circle” is used to start each piece. If you do not prefer this technique, you can start each piece using the following technique: ch 2, then sc x6 into the second chain away from the hook. Sl st to join the round. This creates Round 1. ♥ For this model, I used Loops and Threads Impeccable yarn ♥ The koala’s body parts are all the same as the bear’s parts except for the snout, ears, and the fact that the koala has no tail. Therefore, some bear photos may be repeated for assembly purposes.
Belly: 2.5” wide & 3.25” tall
Head: Using Color A, Round 1: Magic Circle with a base of 6 stitches Round 2: inc x6= 12 sts Round 3: (1 inc, sc in next st) x6 = 18 sts Round 4: (1 inc, sc in next 2 sts) x6 = 24 sts Round 5: (1 inc, sc in next 3 sts) x6 = 30 sts Round 6: (1 inc, sc in next 4 sts) x6 = 36 sts Round 7: (1 inc, sc in next 5 sts) x6 = 42 sts Round 8: (1 inc, sc in next 6 sts) x6 = 48 sts Round 9: (1 inc, sc in next 7 sts) x6 = 54 sts Round 10: (1 inc, sc in next 8 sts) x6 = 60 sts Round 11: (1 inc, sc in next 9 sts) x6 = 66 sts Round 12: (1 inc, sc in next 10 sts) x6 = 72 sts Round 13: (1 inc, sc in next 11 sts) x6 = 78 sts Round 14: (1 inc, sc in next 12 sts) x6 = 84 sts Round 15: (1 inc, sc in next 13 sts) x6 = 90 sts Round 16: (1 inc, sc in next 14 sts) x6 = 96 sts Round 17: (1 inc, sc in next 15 sts) x6 = 102 sts Round 18: (1 inc, sc in next 16 sts) x6 = 108 sts Round 19: (1 inc, sc in next 17 sts) x6 = 114 sts Round 20: (1 inc, sc in next 18 sts) x6 = 120 sts Round 21: (1 inc, sc in next 19 sts) x6 = 126 sts Round 22: (1 inc, sc in next 20 sts) x6 = 132 sts Round 23-26: sc in the next 132 sts = 132 sts Round 27: (Mark this round before continuing) (1 dec, sc in next 20 sts) x6 = 126 sts Round 28: (1 dec, sc in next 19 sts) x6 = 120 sts Round 29: (1 dec, sc in next 18 sts) x6 = 114 sts Round 30: (1 dec, sc in next 17 sts) x6 = 108 sts Round 31: (1 dec, sc in next 16 sts) x6 = 102 sts Round 32: (1 dec, sc in next 15 sts) x6 = 96 sts Round 33: (1 dec, sc in next 14 sts) x6 = 90 sts Round 34: (1 dec, sc in next 13 sts) x6 = 84 sts Round 35: (1 dec, sc in next 12 sts) x6 = 78 sts Round 36: (1 dec, sc in next 11 sts) x6 = 72 sts Round 37: (1 dec, sc in next 10 sts) x6 = 66 sts Round 38: (1 dec, sc in next 9 sts) x6 = 60 sts Round 39: (1 dec, sc in next 8 sts) x6 = 54 sts
Continue crocheting the head: Round 40: (1 dec, sc in next 7 sts) x6 = 48 sts Round 41: (1 dec, sc in next 6 sts) x6 = 42 sts Round 42: (1 dec, sc in next 5 sts) x6 = 36 sts
Begin stuffing the head with PolyFil and continue stuffing as you go.
*Helpful tip: Stuff the head with A LOT of stuffing! When you think you’ve stuffed enough, stuff some more! This will help you round out the 6 corners that were created from increasing and decreasing, thus smoothing out the shape of the head.
Round 43: (1 dec, sc in next 4 sts) x6 = 30 sts Round 44: (1 dec, sc in next 3 sts) x6 = 24 sts Round 45: (1 dec, sc in next 2 sts) x6 = 18 sts Round 46: (1 dec, sc in next st) x6 = 12 sts Round 47: dec x6= 6 sts Fasten off and leave a 6” tail. Use the tail to sew the head shut.
Work on face: Insert eyes between Rounds 27 and 28. They should be about 29 sts apart. When satisfied with eye placement, attach washers to secure them in place.
Using Color A, Round 1: Magic Circle with a base of 6 stitches Round 2: inc x6= 12 sts Round 3: (1 inc, sc in next st) x6 = 18 sts Round 4: (1 inc, sc in next 2 sts) x6 = 24 sts Round 5: (1 inc, sc in next 3 sts) x6 = 30 sts Round 6: (1 inc, sc in next 4 sts) x6 = 36 sts Round 7: (1 inc, sc in next 5 sts) x6 = 42 sts Round 8: (1 inc, sc in next 6 sts) x6 = 48 sts Round 9: (1 inc, sc in next 7 sts) x6 = 54 sts Round 10: sc in the next 54 sts = 54 sts Round 11: (1 dec, sc in next 7 sts) x6 = 48 sts Round 12-13: sc in the next 48 sts = 48 sts Round 14: (1 dec, sc in next 6 sts) x6 = 42 sts Round 15: (1 dec, sc in next 5 sts) x6 = 36 sts Round 16: (1 dec, sc in next 4 sts) x6 = 30 sts Fasten off and leave a 12” tail. Ears do not need to be stuffed. DO NOT sew the ear shut yet.
Using Color C, Round 1: Magic Circle with a base of 6 stitches Round 2: inc x6= 12 sts Round 3: (1 inc, sc in next st) x6 = 18 sts Round 4: (1 inc, sc in next 2 sts) x6 = 24 sts Round 5: (1 inc, sc in next 3 sts) x6 = 30 sts Round 6: (1 inc, sc in next 4 sts) x6 = 36 sts Fasten off and leave a 12” tail. Sew this white patch to the koala’s ear, making sure that it connects with the base of the ear. Hide the extra yarn tail inside the ear. Use the Color A yarn tail to sew the ears shut. Use your thumbs to push on the white portion of the ears to shape them into a bowl. Then use the rest of the Color A yarn to sew the ears to the head. Snout: Using Color B, Round 1: Magic Circle with a base of 6 stitches Round 2: inc x6= 12 sts Round 3: (1 inc, sc in next st) x6 = 18 sts Round 4: (1 inc, sc in next 2 sts) x6 = 24 sts Round 5: (1 inc, sc in next 3 sts) x6 = 30 sts Round 6: (1 inc, sc in next 4 sts) x6 = 36 sts Round 7: (1 inc, sc in next 5 sts) x6 = 42 sts Round 8: hdc in first st, dc in next 4 sts, hdc in next st, sc in next 36 sts
Place the snout between the koala’s eyes. The Magic Circle (Round 1) should line up on Round 25. Begin sewing the snout in place. Gently stuff the snout with Poly-Fil as you go. When finished securing the snout in place, hide the extra yarn tail in the nose.
Glue the white crescent shape (chin) right beneath the snout. Trim as necessary until the concave portion of the chin lines up with the bottom of the snout.
Using Color A, Round 1: Magic Circle with a base of 6 stitches Round 2: inc x6= 12 sts Round 3: (1 inc, sc in next st) x6 = 18 sts Round 4: (1 inc, sc in next 2 sts) x6 = 24 sts Round 5: (1 inc, sc in next 3 sts) x6 = 30 sts Round 6: (1 inc, sc in next 4 sts) x6 = 36 sts Round 7: (1 inc, sc in next 5 sts) x6 = 42 sts Round 8: (1 inc, sc in next 6 sts) x6 = 48 sts Round 9: (1 inc, sc in next 7 sts) x6 = 54 sts Round 10: sc in the next 54 sts = 54 sts Round 11: (1 dec, sc in next 7 sts) x6 = 48 sts Round 12-13: sc in the next 48 sts = 48 sts Round 14: (1 dec, sc in next 6 sts) x6 = 42 sts Round 15-16: sc in the next 42 sts = 42 sts Round 17: (1 dec, sc in next 5 sts) x6 = 36 sts Round 18-19: sc in the next 36 sts = 36 sts Round 20: (1 dec, sc in next 4 sts) x6 = 30 sts Round 21-23: sc in the next 30 sts = 30 sts Round 24: (1 dec, sc in next 3 sts) x6 = 24 sts Fasten off and leave an 18” tail. Stuff body with a lot of PolyFil until the body is stiff. This will help the body support the weight of the head. Center the body over Round 47 on the head and then use the yarn tail to sew the body to the head. Stuff the body with more Poly-Fil as you go.
Glue on the felt belly, but leave a small bit of the belly unglued in the bottom right-hand corner. This is where the heart will be located.
Arms (make 2): UsingColorA, Round 1: Magic Circle with a base of 6 stitches Round 2: inc x6= 12 sts Round 3: (1 inc, sc in next st) x6 = 18 sts Round 4: (1 inc, sc in next 2 sts) x6 = 24 sts Round 5: (1 inc, sc in next 3 sts) x6 = 30 sts Round 6: (1 inc, sc in next 4 sts) x6 = 36 sts Round 7: (1 inc, sc in next 5 sts) x6 = 42 sts Round 8: sc in the next 42 sts = 42 sts Round 9: (1 dec, sc in next 5 sts) x6 = 36 sts Round 10: sc in the next 36 sts = 36 sts Round 11: (1 dec, sc in next 4 sts) x6 = 30 sts Round 12-13: sc in the next 30 sts = 30 sts Stuff koala’s hands with Poly-Fil. After hands are stuffed, you do not need to stuff the rest of the arm.
Fasten off and leave a 12” tail. Flatten the opening of the arm by pinching it, then sew it shut with your yarn tail. Use the tail to sew the arm into the crevice where the head meets the body.
Using Color A, Round 1: Magic Circle with a base of 6 stitches Round 2: inc x6= 12 sts Round 3: (1 inc, sc in next st) x6 = 18 sts Round 4: (1 inc, sc in next 2 sts) x6 = 24 sts Round 5: (1 inc, sc in next 3 sts) x6 = 30 sts Round 6: (1 inc, sc in next 4 sts) x6 = 36 sts Round 7: (1 inc, sc in next 5 sts) x6 = 42 sts Round 8: (1 inc, sc in next 6 sts) x6 = 48 sts Round 9: sc in the next 48 sts = 48 sts Round 10: (1 dec, sc in next 6 sts) x6 = 42 sts Round 11: sc in the next 42 sts = 42 sts Round 12: (1 dec, sc in next 5 sts) x6 = 36 sts Round 13-14: sc in the next 36 sts = 36 sts Round 15: (1 dec, sc in next 4 sts) x6 = 30 sts Round 16-18: sc in the next 30 sts = 30 sts Round 19: (1 dec, sc in next 3 sts) x6 = 24 sts Stuff bear’s feet with Poly-Fil. After feet are stuffed, you do not need to stuff the rest of the leg.
Continue crocheting leg: Round 20-23: sc in the next 24 sts = 24 sts Round 24: (1 dec, sc in next 2 sts) x6 = 18 sts Round 25-32: sc in the next 18 sts = 18 sts
Heart applique: *Note: Each comma represents “in the next stitch.” Example: “2 tr, 1 dc, 1 hdc” means “2tr into first stitch. 1 dc in the next stitch. 1 hdc in the next stitch.”
Using Color B, Round 1: Magic Circle with a base of 7 stitches Round 2: ch 3 & 2 tr, 1 dc, 1 hdc, ch 1 & 1 dc, ch 1 & 1 hdc, 1 dc, 2 tr. Ch 3 & sl st to join with the base of the first st. Fasten off and leave a 10” tail. Use this tail to sew the heart applique onto the bear’s body, going through the spot of felt that you did not glue down earlier.
AND YOU’RE FINALLY FINISHED!!! Celebrate by dancing with your koala. J
Date: 2015-12-24; view: 790
|
 v Printer-friendly version: no photos (pgs. 16-19)

 v Contact information, copyright notes, and recommendations (pg. 20)
 Huggable Bear Pattern
 0.75” down from the top, and insert nose. DO NOT attach washer at this time.
 and then use this yarn tail to sew a little line underneath the bear’s nose. Weave the rest of the yarn into the head hide the tail. Use fabric glue to fasten the felt snout in place.
 Phew! Pat yourself on the back. Now that you’ve finished the head, the rest of the body will feel super quick to whip up!
 Ears (make 2):
 Round 1: Magic Circle with a base of 6 stitches
 Arms (make 2):
 Fasten off and leave a 12” tail. Flatten the opening of the arm by pinching it, then sew it shut with your yarn tail. Use the tail to sew the arm into the crevice where the head meets the body.
 *Note: Each comma represents “in the next stitch.”
 stitch. 1 dc in the next stitch. 1 hdc in the next stitch.”
 & 3.25” tall
 Using Color A,
 Huggable koala Pattern
 Preparation: Cut tan craft felt pieces into the shapes displayed below. Shapes are not proportional in relation to each other:
 Chin: 1.5” wide
 Weave the rest of the yarn into the head hide the tail. Use fabric glue to fasten the felt snout in place.
 Phew! Pat yourself on the back. Now that you’ve finished the head, the rest of the body will feel super quick to whip up!
 Ears (make 2):
 Round 9: sc in first st, hdc in next st, 2 dc in next st, hdc in next st, sc in next 38 sts
 Work on face:
 Body:
Body: Round 14: (1 dec, sc in next 3 sts) x6 = 24 sts Round 15-16: sc in the next 24 sts = 24 sts Round 17: (1 dec, sc in next 2 sts) x6 = 18 sts Round 18-30: sc in the next 18 sts = 18 sts
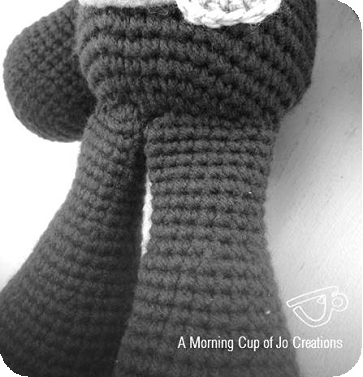 Legs (make 2):
 Fasten off and leave a 12” tail. Flatten the opening of the leg by pinching it, then sew it shut with your yarn tail. Use the tail to sew the leg in place.