CATEGORIES:
BiologyChemistryConstructionCultureEcologyEconomyElectronicsFinanceGeographyHistoryInformaticsLawMathematicsMechanicsMedicineOtherPedagogyPhilosophyPhysicsPolicyPsychologySociologySportTourism
Playing with Displace Filter in Photoshop
I have been playing a lot with the Displace filter in Photoshop and I still get impressed with how powerful it is. Even though I have written some tutorials using it, I decided to try to recreate a different effect that I saw in one of the images submitted for the Daily Inspiration. It was a brick wall deformed like it was made of cloth.
So in this tutorial, or a quick-tips I will show you how to create a curtain made of bricks or how to deform a brick wall as it was a curtain. To do that we wil use a few stock photos, layer adjustments and the Displace filter in Photoshop CS5. The technique is pretty simple and the tutorial won't take you more than 30 minutes to go through it.
Step 1
Open Photoshop and create a new document. I'm using 2560 x 1440 pixels for the size. After that import an photo of a brick wall. The one I used is courtesy of Shutterstock and you can find it herehttp://www.shutterstock.com/pic-56014678/stock-photo-red-brick-wall.html

Step 2
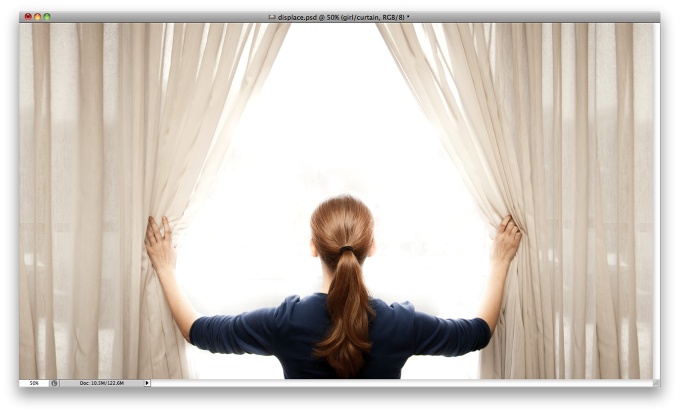
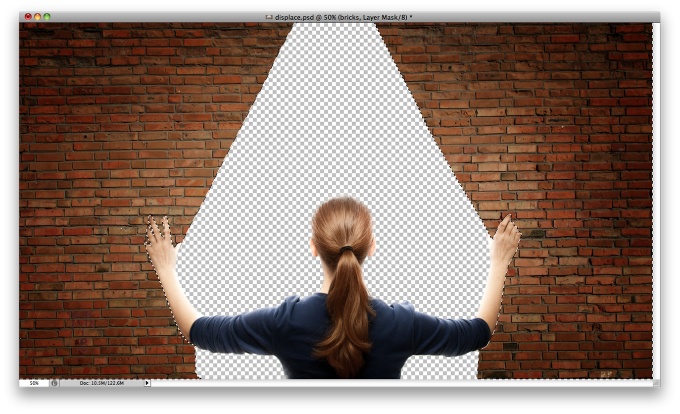
Let's import another image, now of a girl opening the curtains. This photo is also courtesy of Shutterstock and can be found here. http://www.shutterstock.com/pic-44776357/stock-photo-a-young-woman-openi...
Step 3
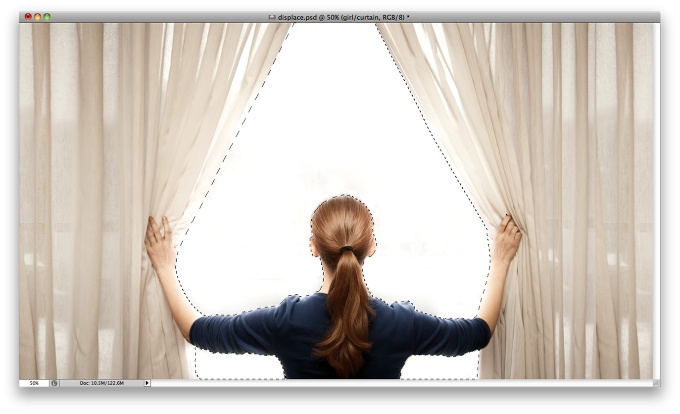
With the Lasso Tool (L) or the Pen Tool (P) select the empty white. Once you select the areas you can go to Select>Refine Edges. Select the Smart Radius over the Edge Detection and then click on the brush icon on this panel to select the Refine Edges Tool. Paint on the edge of the hair to refine that area. Once you have the selection refined, go to Layer>Layer Mask>Hide Selection, or you can do that on the Refine Edges settings too.
Step 5
Now select the hands/arms of the girl and the curtains.
Step 6
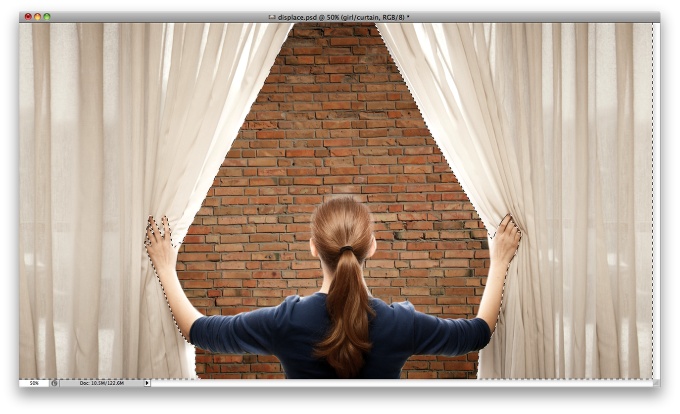
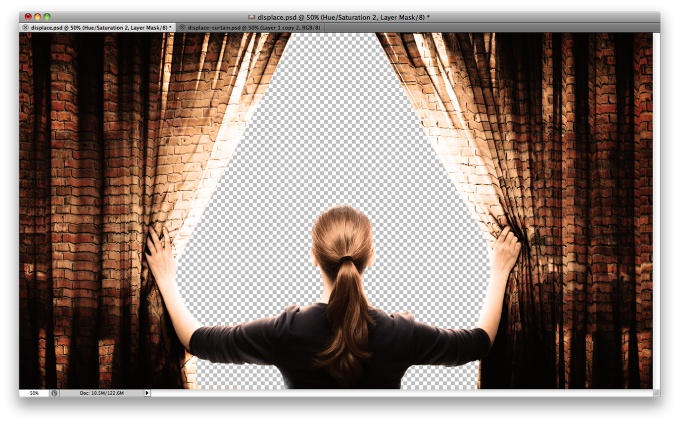
Move the brick wall layer so it will be in front of the girl layer. As you can see in the image below, there's a marquee selection of the curtains and the arms of the girl.
Step 7
Go to Layer>Layer Mask>Hide Selection. Now you will have the brick wall in front of the curtains.
Step 8
Duplicate the girl layer and delete the girl using the mask of the bricks wall for reference. Then go toImage>Adjustment>Desaturate, then go to Image>Adjustment>Levels. Increase the black inputs and a little bit of the white. Checkouttheimagebelowforreference.

Step 9
Change the Blend Mode of the Layer to Overlay. Your result will be something like the image below. You can make the effect strogner by duplicating the layer if you want, but then you will have to change the opacity otherwise it will get too dark.

Step 10
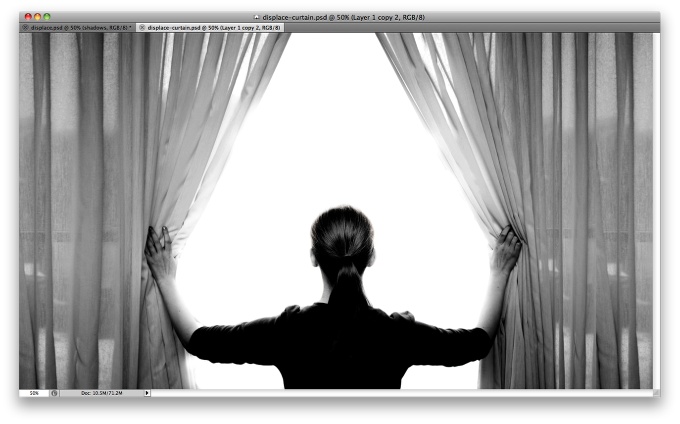
Now we will need the photo of the girl opening the curtains in Black and White. Open the file again in a document with the same size as your design (2560x1440) and then go toImage>Adjustment>Desaturate and then Image>Adjustments>Levels. Increase the black input and a little bit of the white input as well until you get a result like the image below. Savethisfileas a Photoshopformat.
Step 11
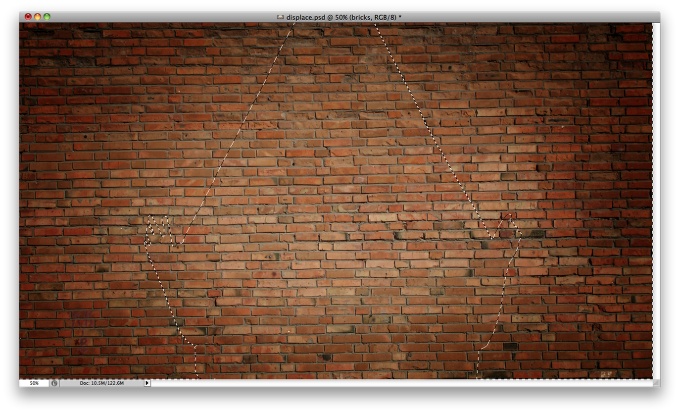
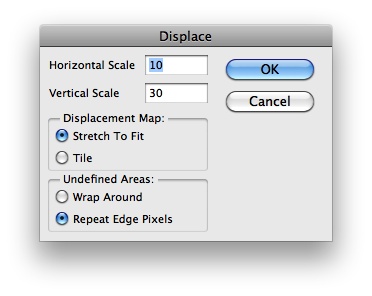
Back to your design select the brick wall layer and go to Filter>Distort>Pixelate. Use 10 for the Horizontal Scale, 30 for the Vertical Scale. Select Stretch to Fit and Repeat Edge Pixels. Press OK and then another dialog box will open asking you to select a file. Select the Photoshop file you saved in the previous step.
Step 12
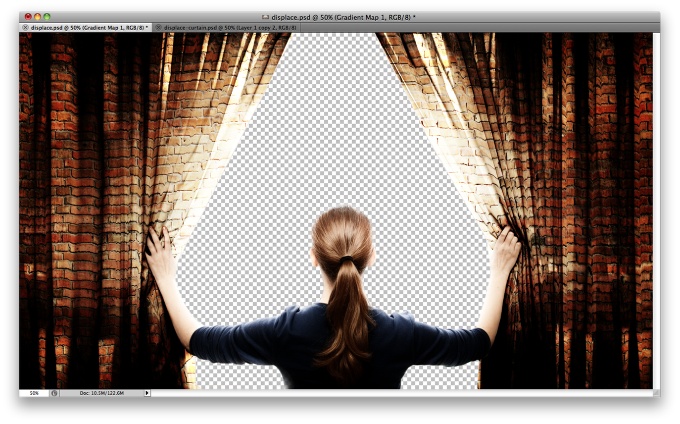
You will notice that the bricks will be distorted following the highlight and shadows of the curtain file. After that go to Layer>New Adjustment Layer>Gradient Map. Make sure that it'sbalck and white and the change the Blend Mode to Soft Light.
Step 13
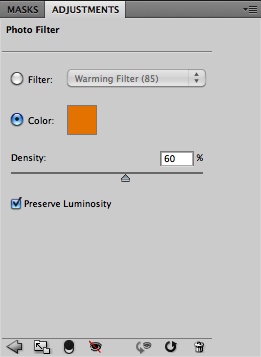
On top of the other layers, go to Layer>New Adjustment Layer>Photo Filter. Use orangeforthecolorwith 60% Density.
Step 14
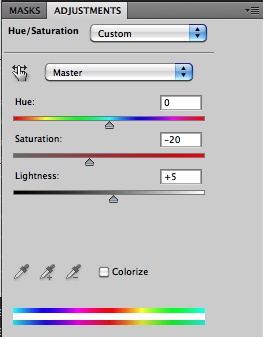
Let's add another adjustment layer, go to Layer>New Adjustment Layer>Hue and Saturation. Changethe Saturationto -20.
Step 15
After all the layer styles you will probably get a result like the one in the image below.
Step 16
Import another image, this time a landscape image to be used as the background, like the girl is open this brick wall and now she can see this field. The image I used is courtesy of Shutterstock and you can find it here. http://www.shutterstock.com/pic-61151230/stock-photo-daylily-flower-at-s...

Step 17
With the field layer selected go to Image>Adjustment>Hue and Saturation .Changethe Hueto -35 andtheSaturationto -50.

Step 18
Add a new layer on top of the others and fill it with black, then with the Brush Tool (B) select a very soft brush and white for the color. Then paint with white in the center until you get a white ellipse. After that just change the Blend Mode to Multiply to create a vignette effect.

Step 19
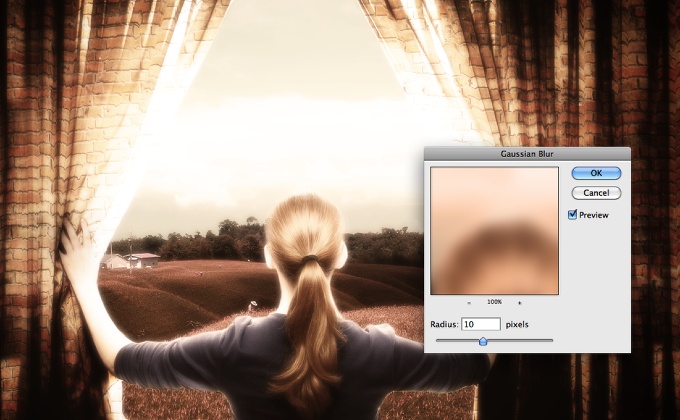
Select the layer on top and then using the shortcut keyboard Command+Alt+Shift+E to create new layer with all layers merged into it. After that with this new layer selected go to Filter>Blur>Gaussian Blur. Use 10 pixels for the Radius. Change this layer's Blend Mode to Screen and the Opacity to 60%.
Conclusion
You can repeat the same keyboard shortcut applied in the previous step and create another layer with all layers merged, then add some noise to the image. Go to Filter>Noise>Add Noise. I used 3% for the Amount and Gaussian for the Distribution.
The effect is done, and once again we used the Displace filter to add more realism to our design. I love the Displace filter and I've been playing a lot with it. In this example I used the curtains to distort the bricks. Of course this is just a concept, there's a lot of adjustments to be make in order to make it look perfect, however the technique is the same, the only difference is the amount of time you will have to put into it.
Now it's up to you, you can try different images and see the result, the most important thing is that you practice and have fun with Photoshop.

Date: 2015-04-20; view: 32841
| <== previous page | | | next page ==> |
| PLAYING FOR LOVE AT DEEP HAVEN | | | Political system of Great Britain |