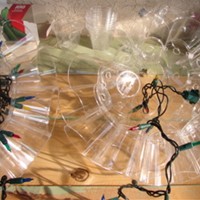
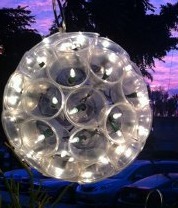
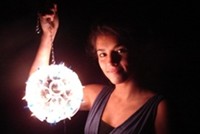
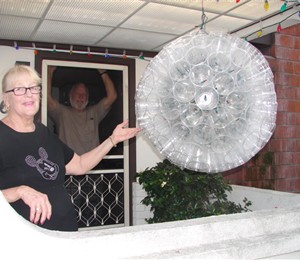
If you have plastic cups leftover from entertaining over the holidays, here's a way to recycle them into an LED light that is perfect for your New Year's party. The light is illuminated using battery-operated LED fairy lights and is stunning once switched on. You can hang it on the patio or in the garden to add fun lighting to your party.
I got the original idea for this project from seeing sparkleballs on the Internet. The only problem is that it was impossible to find the right size of plastic cups to make the sparkleball, plus I wanted to use plastic cups leftover from entertaining over the holidays.
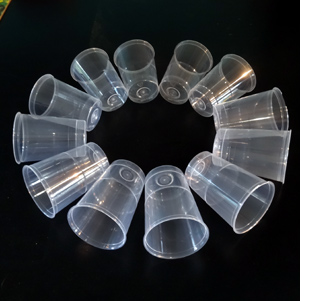
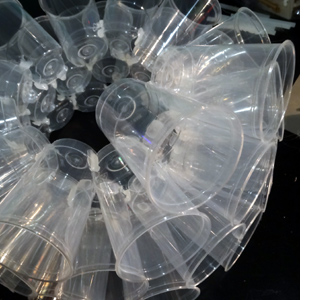
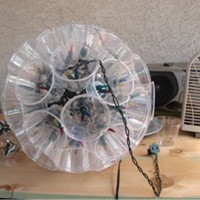
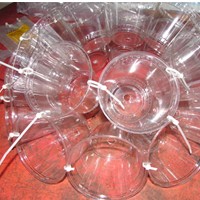
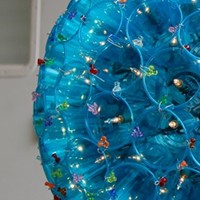
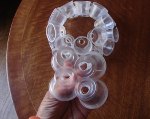
Although I didn't quite make a ball, the light still came out great and will defnitely be used for my New Year's party. The transparent plastic cups bounce the colourful, flashing LED lights around the room.
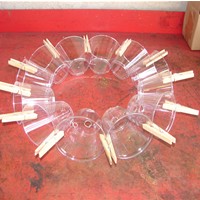
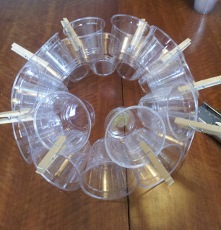
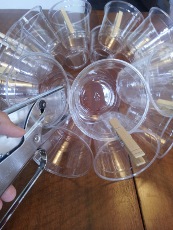
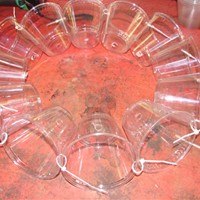
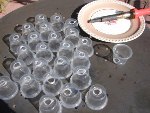
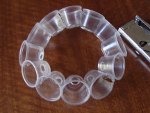
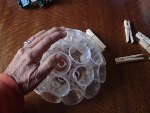
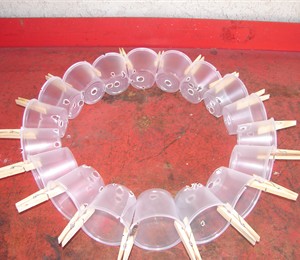
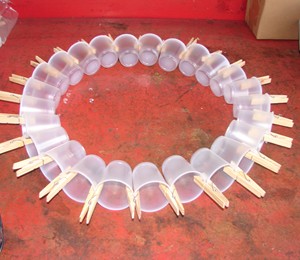
ЧтобысделатьтакуюверсиюСпаркбоола, нужно 46 прозрачныхстаканчиков. Их таких стаканчиков сложно сделать полный круг, поэтому их вершины не касаются друг друга (так круг получается меньше).
.
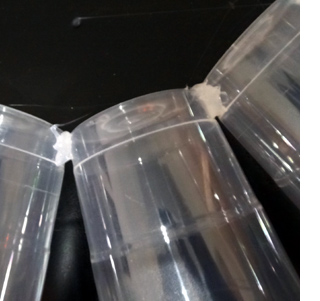
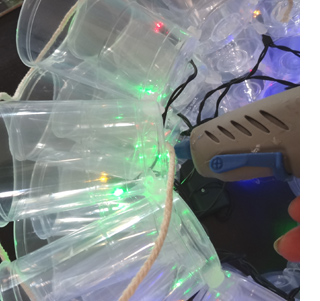
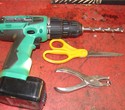
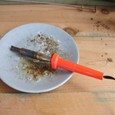
Rather than use a stapler or soldering iron, I decided it would be far less fuss to use a hot glue gun.
A Dremel glue gun is the best to use for this, as you can control the heat setting and have a on low so that the glue sets hard much faster, which means less holding the cups in place until the glue hardens.
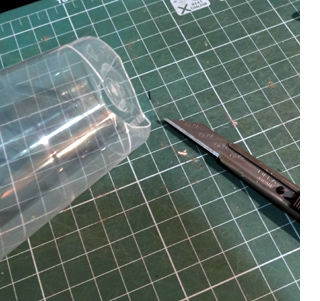
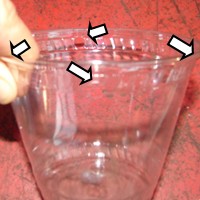
There were a few cups here and there that needed to be cut off on both sides to fit into spaces.
I used a sharp craft knife and cutting mat to cut out small sections where necessary.
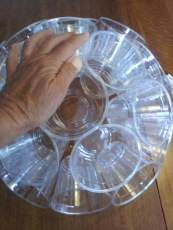
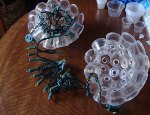
Glue each layer on top of the previous layer, adjusting the plastic cups so that they overlap each other as you go around.
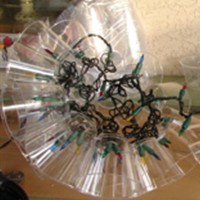
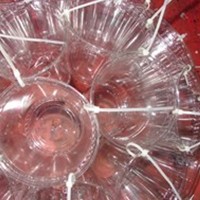
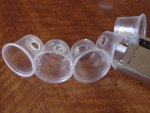
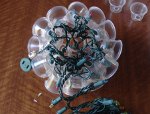
The LED lights are not glued in place, I simply pushed individual lights through gaps in the cups.
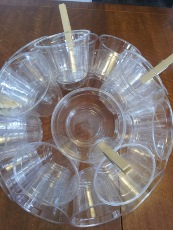
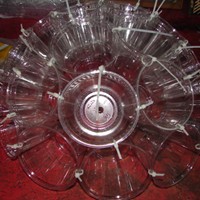
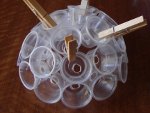
To be able to hang the LED light, I glued two long strips of string to the inside of the cups.
You could also use thin chain if you want a more decorative finish.
My lights will be outdoors, so you won't really see them in the dark.
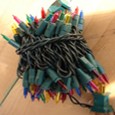
These are battery-operated LED lights that will be hung around the garden on New Year's Eve.
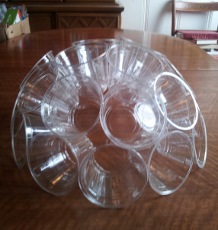
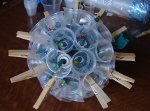
I had an old plastic light that fitted perfectly in the middle of the circle, so I decided to use this to hold the battery pack for the lights.
Alternatively, hot glue the battery pack to the inside circle.
basic 13" sparkleball made with
soldering iron
You also need :
- 50 cups, hard or soft plastic, 9 oz tumbler style
- 100 mini-lights
- good ventilation
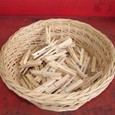
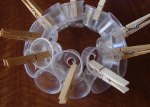
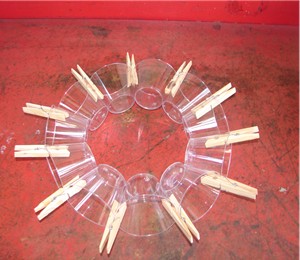
also helpful: clothespins
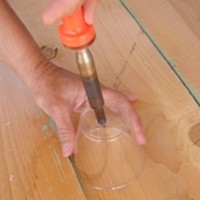
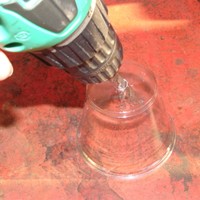
Melt a 1/4 - 1/2 in. hole in bottoms of 50 cups. Test hole to make sure 2 mini-lights will fit. Snug is good.
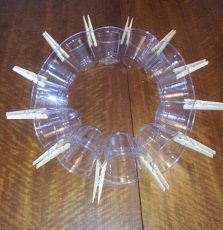
Put 12 cups in a circle. If 12 doesn't make a circle, your cups aren't the right size.
Press hot iron through one cup to the next, at cup bottoms. Melted part will cool and form a strong bond while you hold cups together.
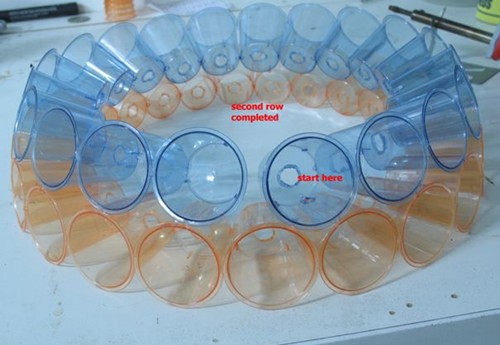
Add 9 cups on top of the first 12. Solder each cup to at least two other cups at cup bottoms. Let joints cool before moving to next cup.
Fit 4 cups into the space left. Join each cup to at least three other cups, at cup bottoms. Don't force cups. There will be gaps.
Now you have half a sparkleball (25 cups). Reinforce this half by melting joints wherever cups touch.
To insert lights, start at plug end of the cord. Put two lights in each cup. Work around, zigzaging from outer cups to inner cups. End up at the cup next to one you started with.
Set aside. Build second half just like first.
For lights on second half, start from the opposite end of the cord.
When all lights are in, press the two halves together so they fit nicely. Make sure all cord is tucked in. Clothespins are a big help to hold halves together while you join them.
Be careful not to burn lights or wire.
Make a hole in the top of your sparkleball, through two cups to make a hanger. Use hook and chain, as shown, or invent your own.
Plug in and enjoy!
Prefer or ?
Basic 13" Sparkleball using
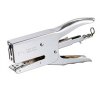
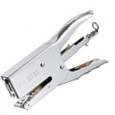
Plier Stapler
(I use the Arrow P22 available from Ace, Amazon, Walmart etc)
You also need:
- 50 9-oz soft plastic cups (the right cups?)
- 100 mini-lights
- drill or soldering iron
- clothespins, optional
Drill a 1/4 - 1/2 in. hole in bottoms of 50 cups. Test hole to make sure 2 mini-lights will fit. Snug is good.
(Or use soldering iron for this step and melt holes.)
Put 12 cups in a circle. If 12 doesn't make a circle, your cups aren't the right size.
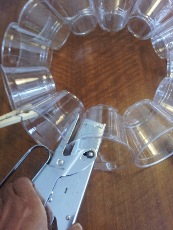
Staple each cup to its neighbor, in the bottom of the cups.
Add 9 cups on top of the first 12.
One by one, staple each cup to the cup under it.
In the space left, fit in 4 cups. Staple each one to the cup under it.
Gently press the top 4 cups down so the half has a nice shape. Now staple each cup to its side neighbor, near cup bottoms. Make sure each cup is well-attached to at least 3 other cups. There will be some gaps. Reinforce with extra staples.
Ready to add lights!
Start at plug end of the cord. Put two lights in each cup. Work around, zigzaging from outer cups to inner cups. End up at the cup next to one you started with.
Set aside. Build the second half the same way.
On second half, start inserting lights from opposite end of the cord.
When all lights are in, press the two halves together so they fit nicely. Make sure all cord is tucked in. Clothespins are a big help to hold halves together while you staple.
Make a hole in the top of your sparkleball, through two cups to make a hanger. Use hook and chain, as shown, or invent your own.
Plug in and enjoy!
Basic 13" Sparkleball using
Hole-puncher and Zip-ties
You also need:
- 50 9-oz soft plastic cups (the right cups)
- 100 mini-lights
- drill or soldering iron
- clothespins, optional
Drill a 1/4 - 1/2 in. hole in bottoms of 50 cups. Test hole to make sure 2 mini-lights will fit. Snug is good.
(Or use soldering iron for this step and melt holes.)
Punch 4 holes in tops of 25 cups (just under the raised lip) so each hole has a hole opposite it.
Placement of the holes doesn't have to be perfect.
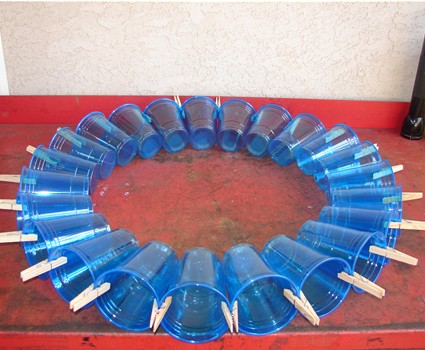
Put 12 cups in a circle. If 12 doesn't make a circle, your cups aren't the right size.
Fasten each cup to its neighbor, with a zip-tie. Pull it closed but DO NOT TIGHTEN all the way. (see photo) When all cups are connected, cinch zip-ties tighter, but make sure cups stay flat in a circle.
Add 9 cups on top of the first 12.
Zip-tie each cup to the one under it. When all 9 cups are in place, thenzip-tie each cup to the one next to it. All 9 cups will be attached at three points (to cup below and cup on either side.) Finally, cinch zip-ties tight.
Fit last 4 cups into the open space and join them to neighboring cups.Each cup will be attached at four points to adjoining cups. Do not tighten the zip-ties until all of them are in place. You may need to press top down lightly to get a nice shape.
Tighten and trim. You're ready to put the lights in.
Start at plug end of the cord. Put two lights in each cup. Work around, zigzaging from outer cups to inner cups. End up at the cup next to one you started with.
Set aside. Build the second half the same way.
On second half, start inserting lights from opposite end of the cord.
When all lights are in, press the two halves together so they fit nicely. Make sure all cord is tucked in. Clothespins are a big help to hold halves together while you join them.
Line up holes and attach zip-ties. Pull tight and trim.
Make a hole in the top of your sparkleball, through two cups to make a hanger. Use hook and chain, as shown, or invent your own.
Thanks to Erika for teaching me the hole-puncher method. She uses colorful plastic beads and coated-wire twists instead of zip-ties.
This solar sparkleball was made by Macky (10), Fritz (9), and Blythe (6) using twisties from bread bags.
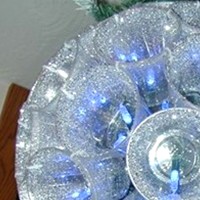
With spray adhesive, James adds glitter to the cups. You can just barely see the white zipties.
Annette uses multi-color zipties.
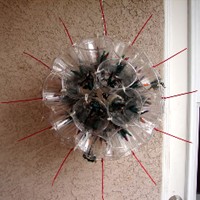
Leave zip-ties untrimmed for a Sputnik Sparkleball.
Tom inserts smaller blue cups inside 9 oz tumblers and joins the cups with yellow coa
6" m i n i
You need :
50 1-oz condiment cups(like ketchup cups; same shape as 9-oz cup)
50 mini-lights
soldering iron or drill
plier stapler
helpful: clothespins
NOTE: This is not a Perfectionist's Sparkleball. The condiment cups may crack, and the shape of the ball is hard to get just right. BUT in the dark, lighted it looks perfectly round and adorable.
To Begin: Melt a hole in the bottom of all 50 cups. Test to make sure a light will fit in.
Or use a drill to make the holes.
12 cups
Start with 12 cups. Staple one cup to the next til you have a circle. As you add a cup, overlap its lip on cup before.
9 cups
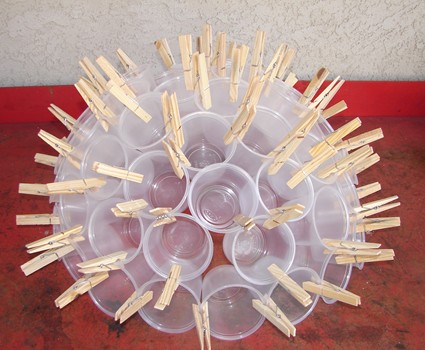
Place 9 cups on top of first layer. Clothespins are handy for this.
Staple each cup to one under it.
4 cups
Pick up last four cups and place them in the empty space.
Pin them in place, then staple.
12 cups + 9 cups + 4 cups = 1/2 sparkleball
Gently press the half ball together so cups touch. Go over the half and staple cups again to reinforce.
TEST LIGHTS BEFORE YOU INSERT THEM.
To insert lights: Start at prong end of the cord. Put one light in each cup. Work your way around the ball-half, zigzagging from outer cups to inner cups. End up at the cup next to one you started with. Set aside.
Build the second half the same way.
Insert lights starting at opposite end of the cord.
Fit the two halves together. Make sure plugs hang out but all wires are tucked inside. Clip together, then staple. Be careful not to staple wire.
Plug in and enjoy!
Here's a mini next to a basic sparkleball.
This one was made using thesoldering method. The lights are bubble LED bought on sale after Christmas.
One of our favorite photos. Monica with her mini-sparkleball.
using any size plastic cups
Form a circle with the cups you want to use. Measure the diameter across the circle in several directions to make sure you've got a perfect circle. Try removing or adding a cup to see if the circle improves. Don't be afraid to stretch it tight. Note how many cups are in this first layer.
Add a ring of cups on top of the first layer to make the second layer.There will be 3-4 cups fewer than first layer. (Gaps between cups are fine.) Clip on the third, fourth, or even fifth layer to finish the half. Note how many cups are in each layer. Make models of both halves and clip together to make sure the sparkleball will be round when you finally make it.
The 5 1/2 oz cup (right) has straighter sides than the standard sparkleball 9 oz cup (left). So even though it's smaller, it takes twice as many to make a sparkleball. Straighter sides mean that it will take more cups to make your sparkleball. (This is all math which I don't understand.)
It takes 23 16 oz cups for the first layer of a giant sparkleball (27" diameter). For great instructions check out Terry Kull's Instructable.
These are small 3 oz bathroom cups. It takes 21 cups for the first layer! (oooops. Not quite a circle. You can see that this one needs work.)
These are 5 oz mini-tumblers from Party City. It takes only 10 of these for the first layer.
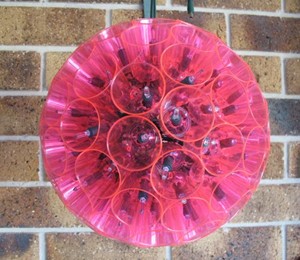
This shows how Rob Cox builds his sparkleballs with 7 oz cups, the only kind available in Australia. See his finished pink sparkleball below.
All of these sparkleballs were made by modifying the 12 - 9 - 4 basic formula and can be built with stapler, hole-puncher, or soldering iron
s n o w m a n
see other snowman variations below
1. You'll make 3 basic sparkleballs using 100 clear mini-lights in each one BUT each ball will have only 46 cups.
On Ball #1, build the first half as usual. But as you fit the last four cups in, have the lights ready to thread. Pull the plug end between the cups, then melt them into place, so the plug end dangles out directly from the top of the ball. Then thread the lights into the cups, 2 lights to a cup.
On the second half you'll leave out the last four cups so there's a gap in the top of the ball half. Make sure the prong end of the lights dangles out the gap. Then finish threading in the lights. Add the leftover 8 lights to 8 lucky cups, so that those cups have 3 lights each instead of 2.
Join the halves. Build Balls #2 and #3 the same way.
2. Set Ball #1 on the ground, with the gap facing the ground. This is your base. (A male end should be hanging out of the bottom to plug into your extension cord.)
Put Ball #2 on top of Ball #1, fitting the gap side onto the rounded top of the bottom ball. Plug them into each other and make sure the lights work.
Then join the balls with the soldering iron. You can notch the cup rims together, as the sparkleball directions show. Or you can make holes between the cups and wire them together.
3. Add Ball #3 to the top of Ball #2. Again, plug in the lights and make sure they all work. Then secure Ball #3.
4. When the body is sturdy and strong, and the plugs are all plugged in and you know the lights work-- then decorate your snowman .
5. If you plan to put your snowman outside, make sure you stake it to the ground so it won't blow over, using tent stakes through holes in the cups or by using wooden dowels inside the snowman.
Thanks to Glenda for instructions and Cuppy for the photo.
A snowman from Italy.Grazie tanto, Marika!
A sparkleball snowperson potluck party decoration fromThrifty Fun.
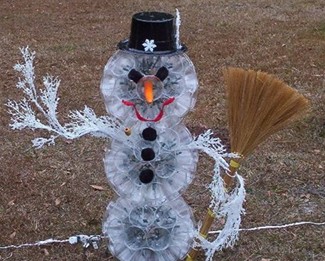
Ron in Brisbane, Australia his sparkleballsnowma from different size cups. To copy Ron and Marika's snowman technique read about Modified Sparkleballs


 The LED lights are not glued in place, I simply pushed individual lights through gaps in the cups.
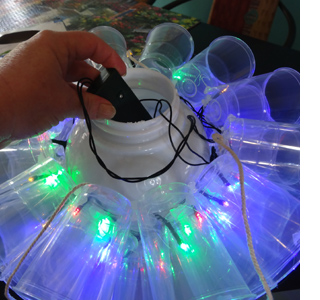


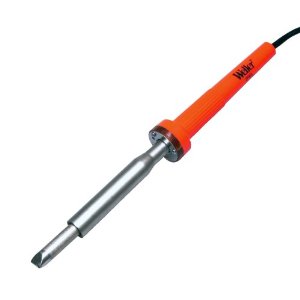 soldering iron


 or
or  ?
?
 Plier Stapler
(I use the Arrow P22 available from Ace, Amazon, Walmart etc)
Plier Stapler
(I use the Arrow P22 available from Ace, Amazon, Walmart etc)


 12 cups
 9 cups
 4 cups


 Form a circle with the cups you want to use. Measure the diameter across the circle in several directions to make sure you've got a perfect circle. Try removing or adding a cup to see if the circle improves. Don't be afraid to stretch it tight. Note how many cups are in this first layer.
 Add a ring of cups on top of the first layer to make the second layer.There will be 3-4 cups fewer than first layer. (Gaps between cups are fine.) Clip on the third, fourth, or even fifth layer to finish the half. Note how many cups are in each layer. Make models of both halves and clip together to make sure the sparkleball will be round when you finally make it.
 The 5 1/2 oz cup (right) has straighter sides than the standard sparkleball 9 oz cup (left). So even though it's smaller, it takes twice as many to make a sparkleball. Straighter sides mean that it will take more cups to make your sparkleball. (This is all math which I don't understand.)
 It takes 23 16 oz cups for the first layer of a giant sparkleball (27" diameter). For great instructions check out Terry Kull's Instructable.
 These are small 3 oz bathroom cups. It takes 21 cups for the first layer! (oooops. Not quite a circle. You can see that this one needs work.)
 These are 5 oz mini-tumblers from Party City. It takes only 10 of these for the first layer.
 This shows how Rob Cox builds his sparkleballs with 7 oz cups, the only kind available in Australia. See his finished pink sparkleball below.
 All of these sparkleballs were made by modifying the 12 - 9 - 4 basic formula and can be built with stapler, hole-puncher, or soldering iron
 see other snowman variations below
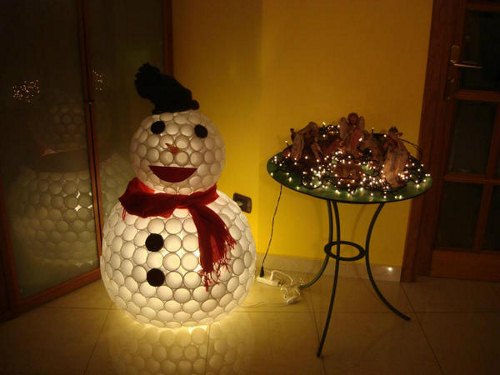 A snowman from Italy. Grazie tanto, Marika!
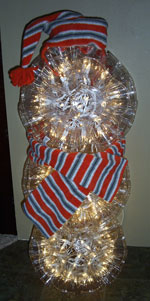 A sparkleball snowperson potluck party decoration fromThrifty Fun.
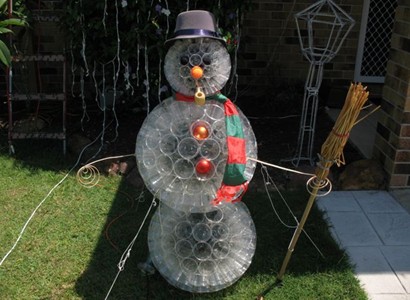 Ron in Brisbane, Australia his sparkleballsnowma from different size cups. To copy Ron and Marika's snowman technique read about Modified Sparkleballs