CATEGORIES:
BiologyChemistryConstructionCultureEcologyEconomyElectronicsFinanceGeographyHistoryInformaticsLawMathematicsMechanicsMedicineOtherPedagogyPhilosophyPhysicsPolicyPsychologySociologySportTourism
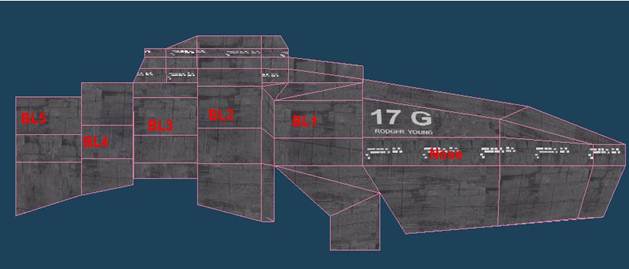
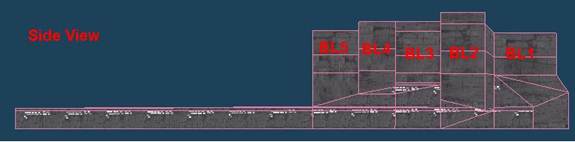
Bridge Lower 1Bridge Lower 2 Bridge Lower 3 Bridge Lower 4 Bridge Lower 5 Bridge Upper
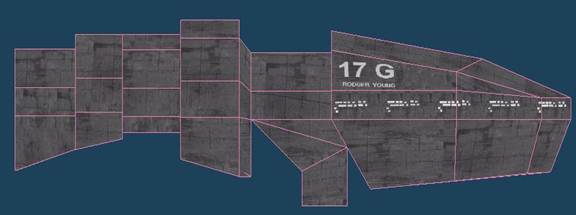
Assemble Parts as listed in order given above. Use the reference pictures below and the texturing of each part for alignment.
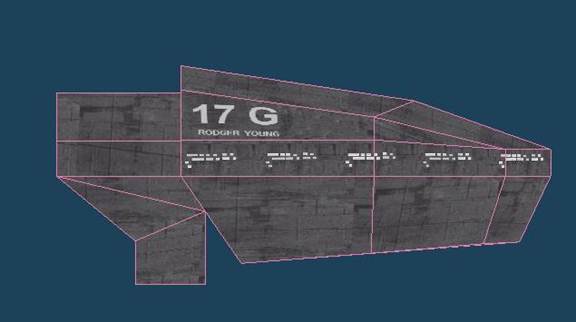
Bridge Lower 1 to Nose Section:
Bridge Lower 2 to BL1/Nose:
Bridge Lower 3 to BL2/BL1/Nose:
Bridge Lower 4 to BL3/BL2/BL1/Nose:
Bridge Lower 5 to BL4/BL3/BL2/BL1/Nose:
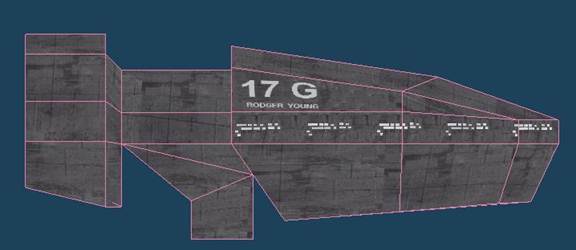
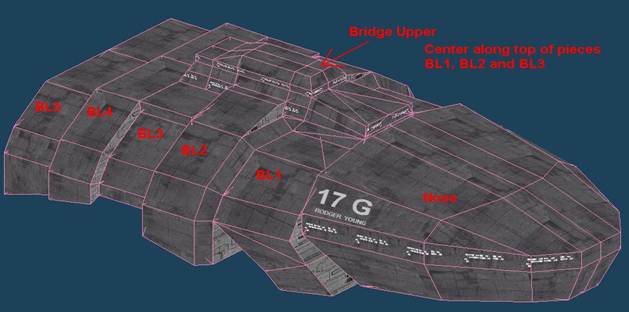
Bridge Upper to BL5/BL4/BL3/BL2/BL1/Nose:
Center Bridge Upper above BL3/2/1 as shown below:
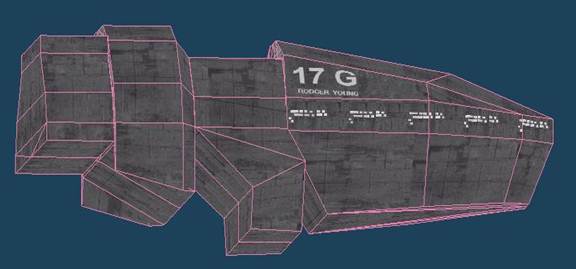
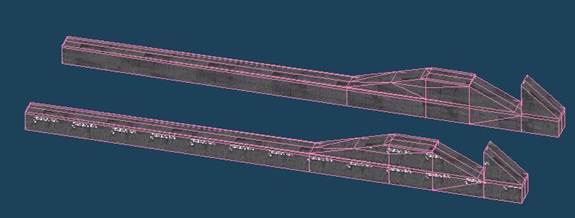
Bridge Supports Upper (Right and Left) Parts: Bridge Supports Upper (R/L)
Cut out the parts listed above and score along indicated lines. Attach the long strips to the main piece at the areas indicated by an “X”. Fold/assemble into the shapes seen below:
Bridge Supports Upper (Right and Left):
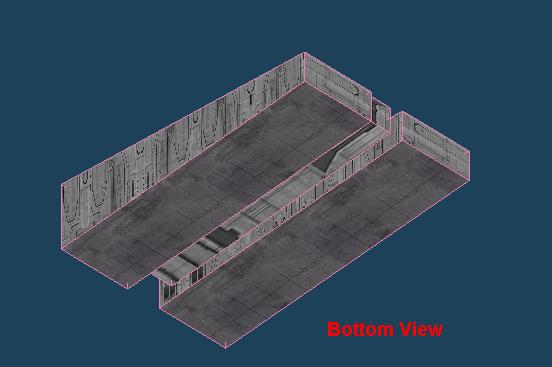
Attach these to the underside of the completed Bridge Assembly, using the following pictures to align:
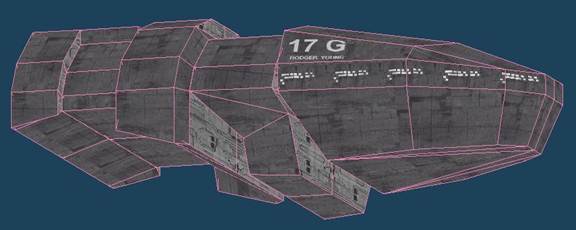
Bottom view:
Please note that the texturing (windows) on the Bridge Supports Upper goes on the OUTSIDE of the assembly. The plain textured part is on the INSIDE of each piece.
Bridge Supports Lower (Right and Left) and Bridge Supports Lower Wedge (R/L/Middle) Parts: Bridge Supports Lower (R and L) Bridge Supports Lower Wedge (R and L) Bridge Supports Lower Wedge (Middle)
Cut out the parts listed above and score along indicated lines. Fold/assemble into the shapes seen below:
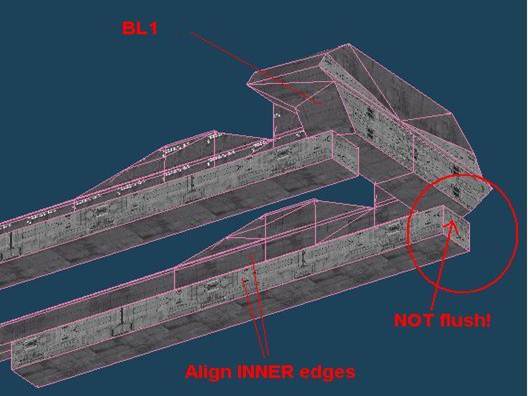
Attach Bridge Supports Lower (R/L) on the underside of Bridge Supports Upper, matching the INSIDE EDGE of each piece to that of the Bridge Supports Upper. Note the position of BL1. The front edge of the Bridge Supports Lower (R/L) should be as shown in the red circle, NOT flush with the forward edge of part BL1.
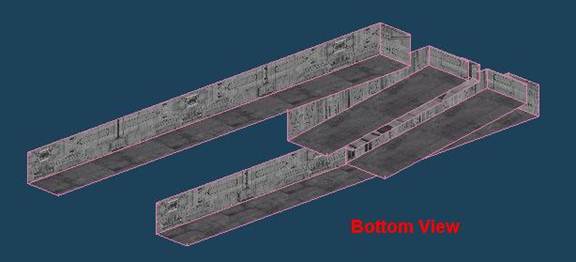
Assemble Bridge Supports Lower Wedge (R and L) and Bridge Supports Lower Wedge (Middle) as shown below. Note the texture on the Lower Wedge (Middle) is located on the BOTTOM of the piece. Note also that the front, rear and top edges of the Wedge (Middle) are NOT FLUSH with the front, rear and top edges of the Wedge (R and L) pieces:
Attach the completed Wedge Assembly between the Bridge Supports Lower (R/L) pieces as shown below: Please note that there WILL BE a gap between the bottom of part BL1 and the Wedge Assembly.
Date: 2015-02-16; view: 622
|